
How to Build Email Campaigns in GoHighLevel
How to Build Email Campaigns in GoHighLevel
Email is still the cheapest way to stay in front of your audience, and GoHighLevel puts the whole process — templates, a drag-and-drop designer, sending, and reporting — under one roof. If you've been paying for a separate email tool, this is one of the first things worth moving over. In this guide we'll build a campaign from scratch, step by step, with screenshots of every screen so you always know where you are.
Step 1: Open Email Marketing
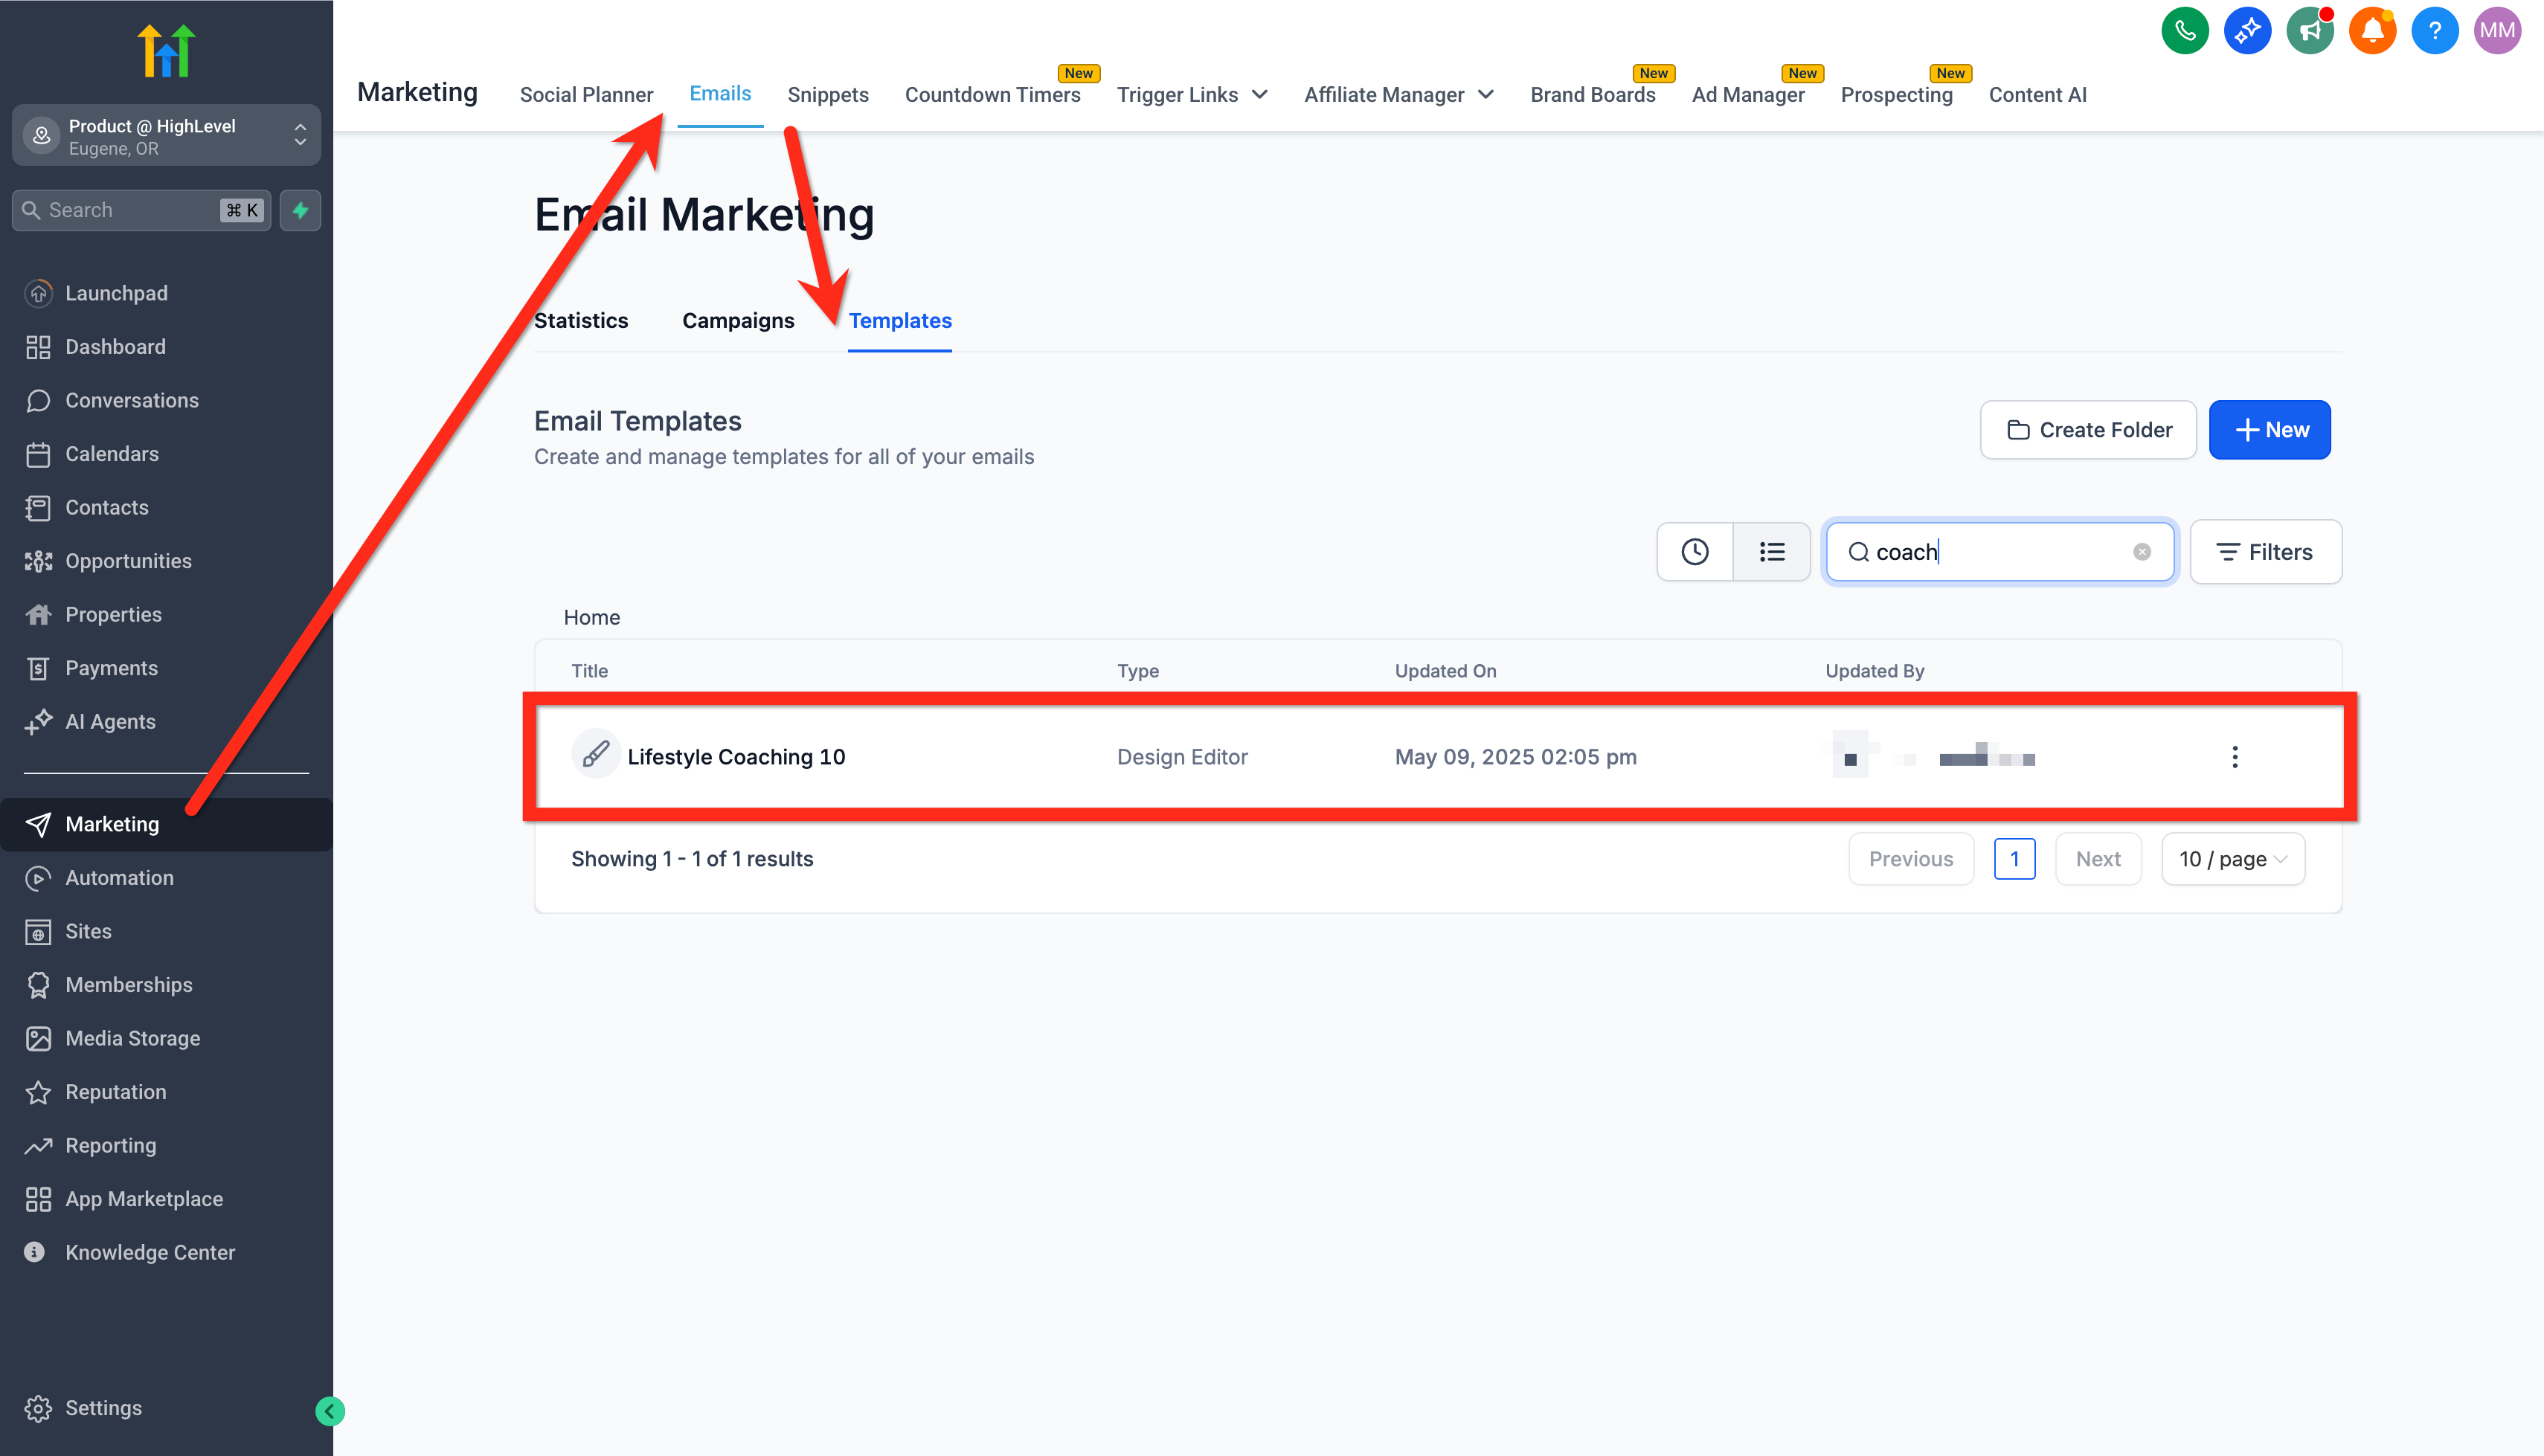
Everything lives under Marketing > Emails. Click into it and you'll see three tabs across the top: Statistics, Campaigns, and Templates. Think of it as a simple flow — you build a look in Templates, turn it into a send in Campaigns, and measure what happened in Statistics. Most people start in Templates so they have something designed before they worry about who to send it to.
Step 2: Start from a template
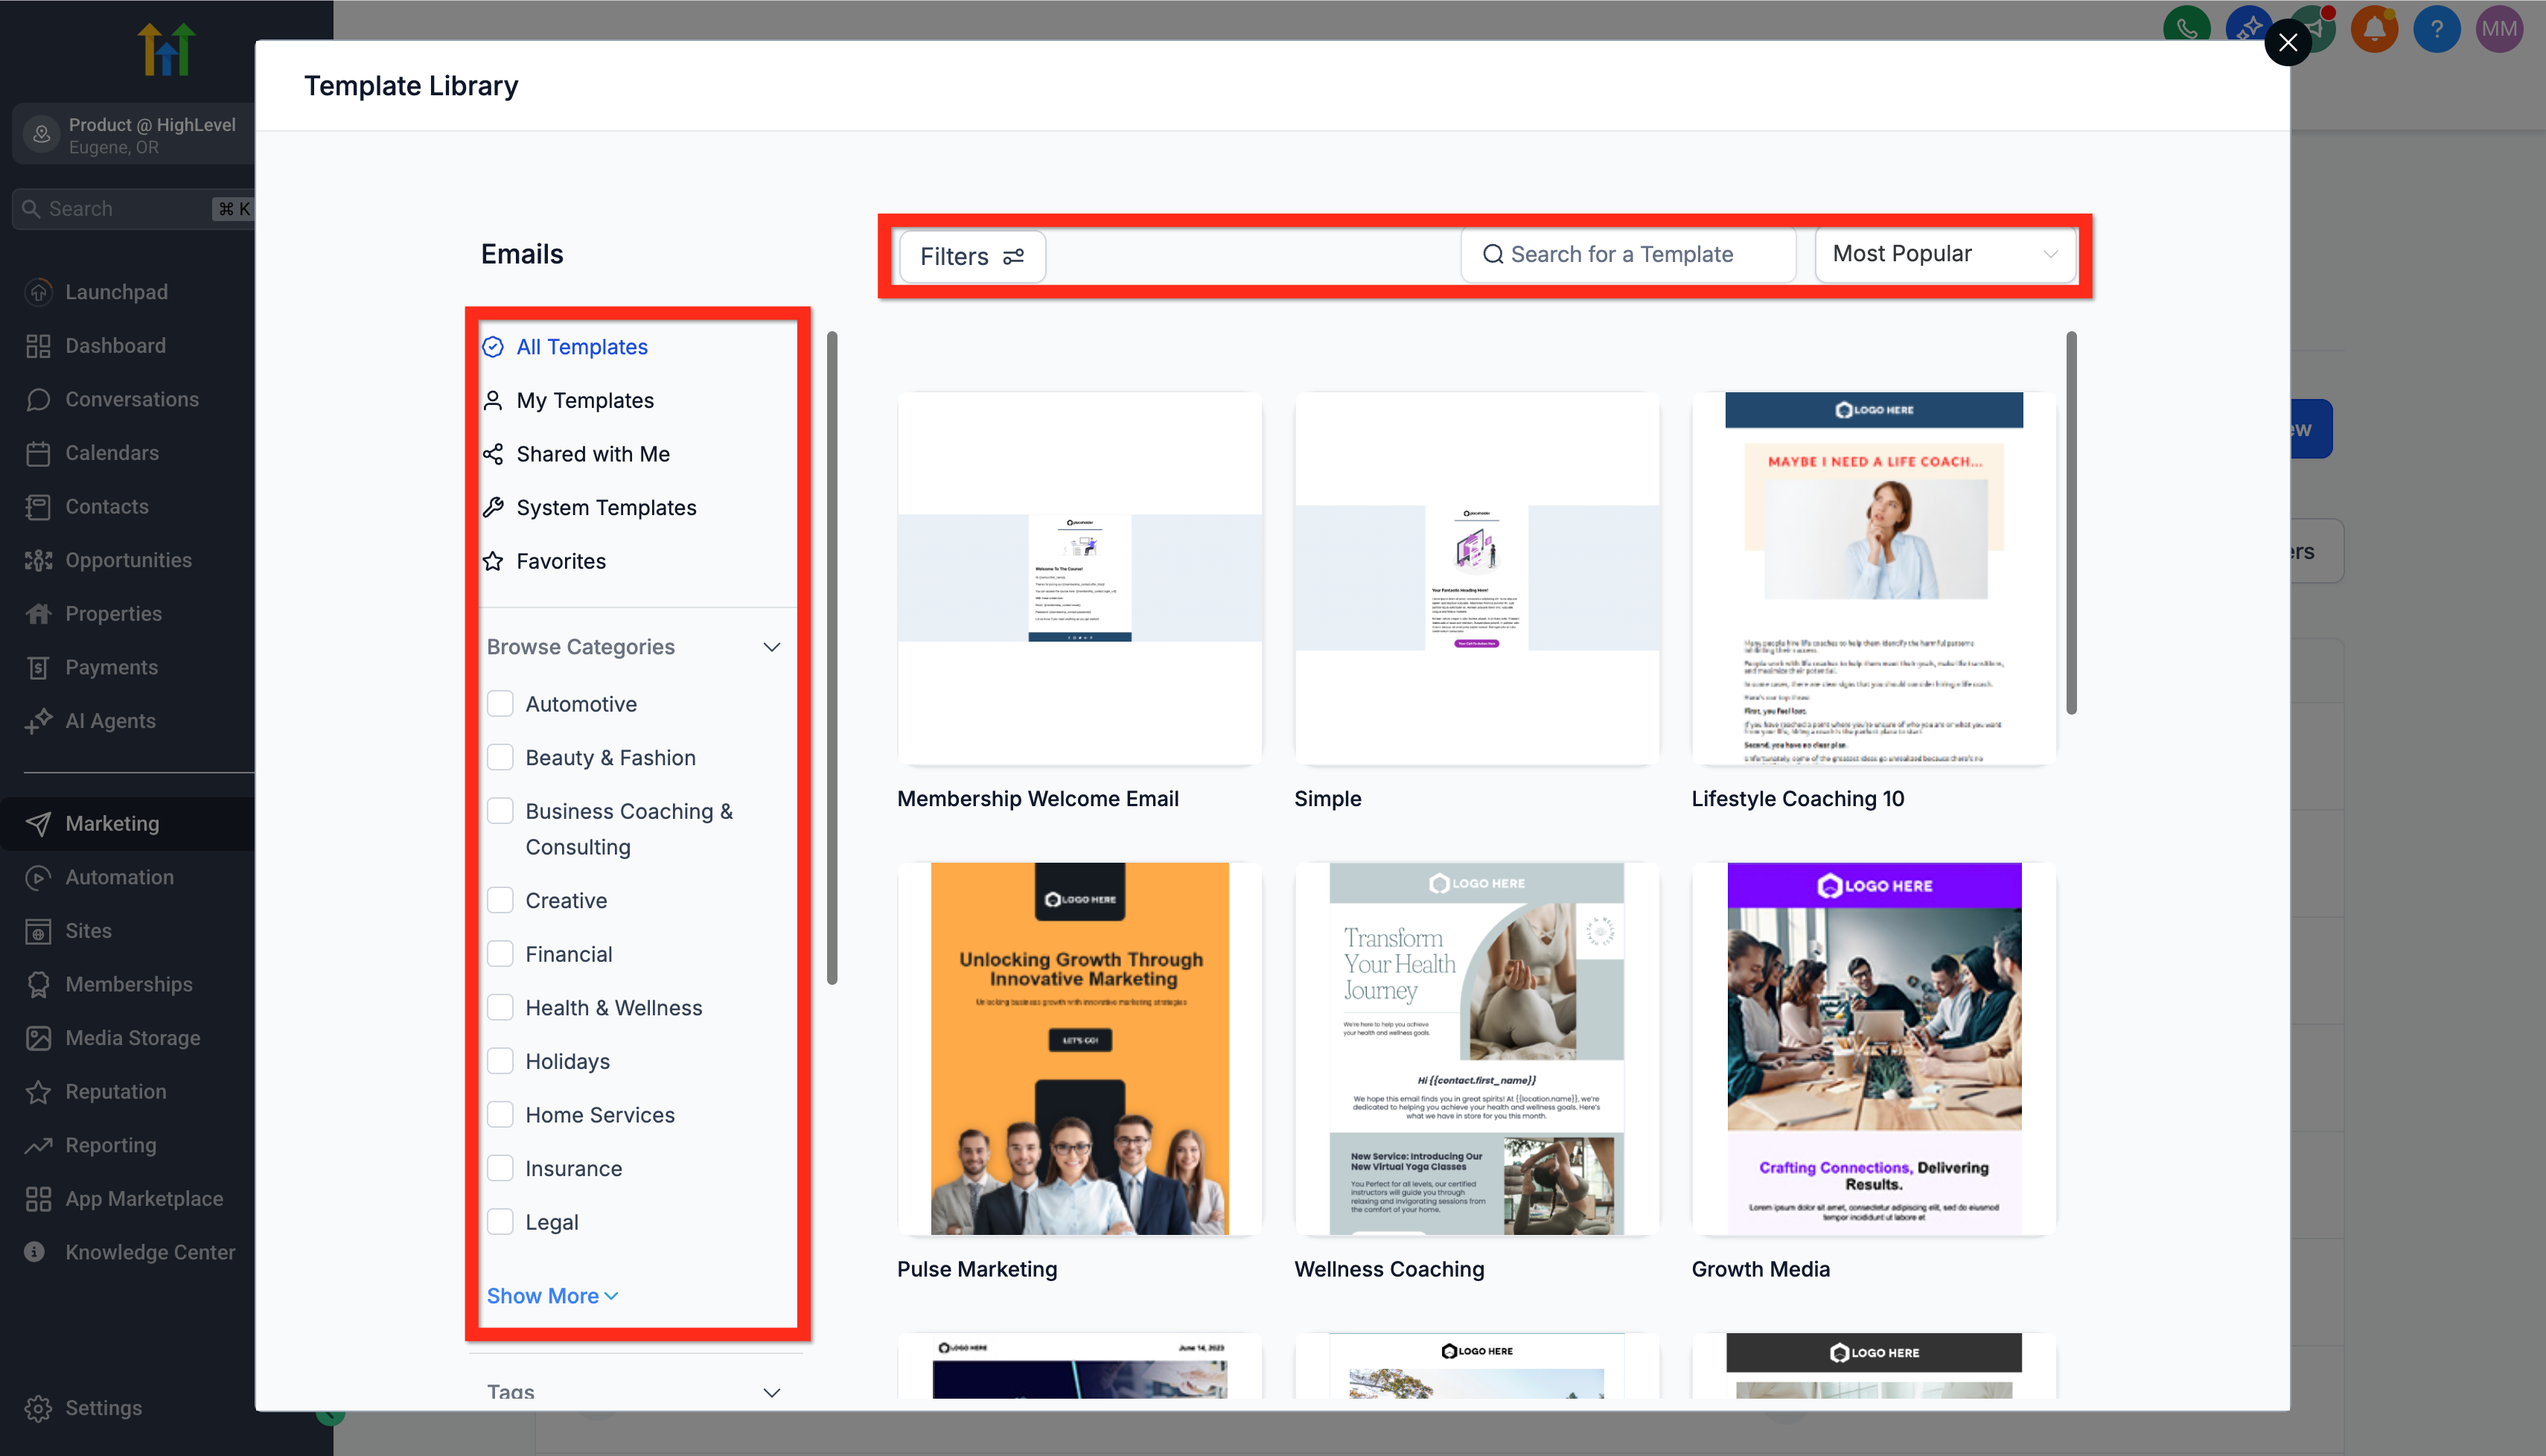
You rarely need to design an email from a blank page. Click New on the Templates tab and open the Template Library — a collection of professionally built layouts you can filter by category (Business Coaching, Financial, Home Services, Health & Wellness, and more). Pick one that's close to what you want; you'll change the words and colors in the next step anyway. Starting from a template mostly saves you from fighting with spacing and mobile layout.
Step 3: Design with the drag-and-drop builder
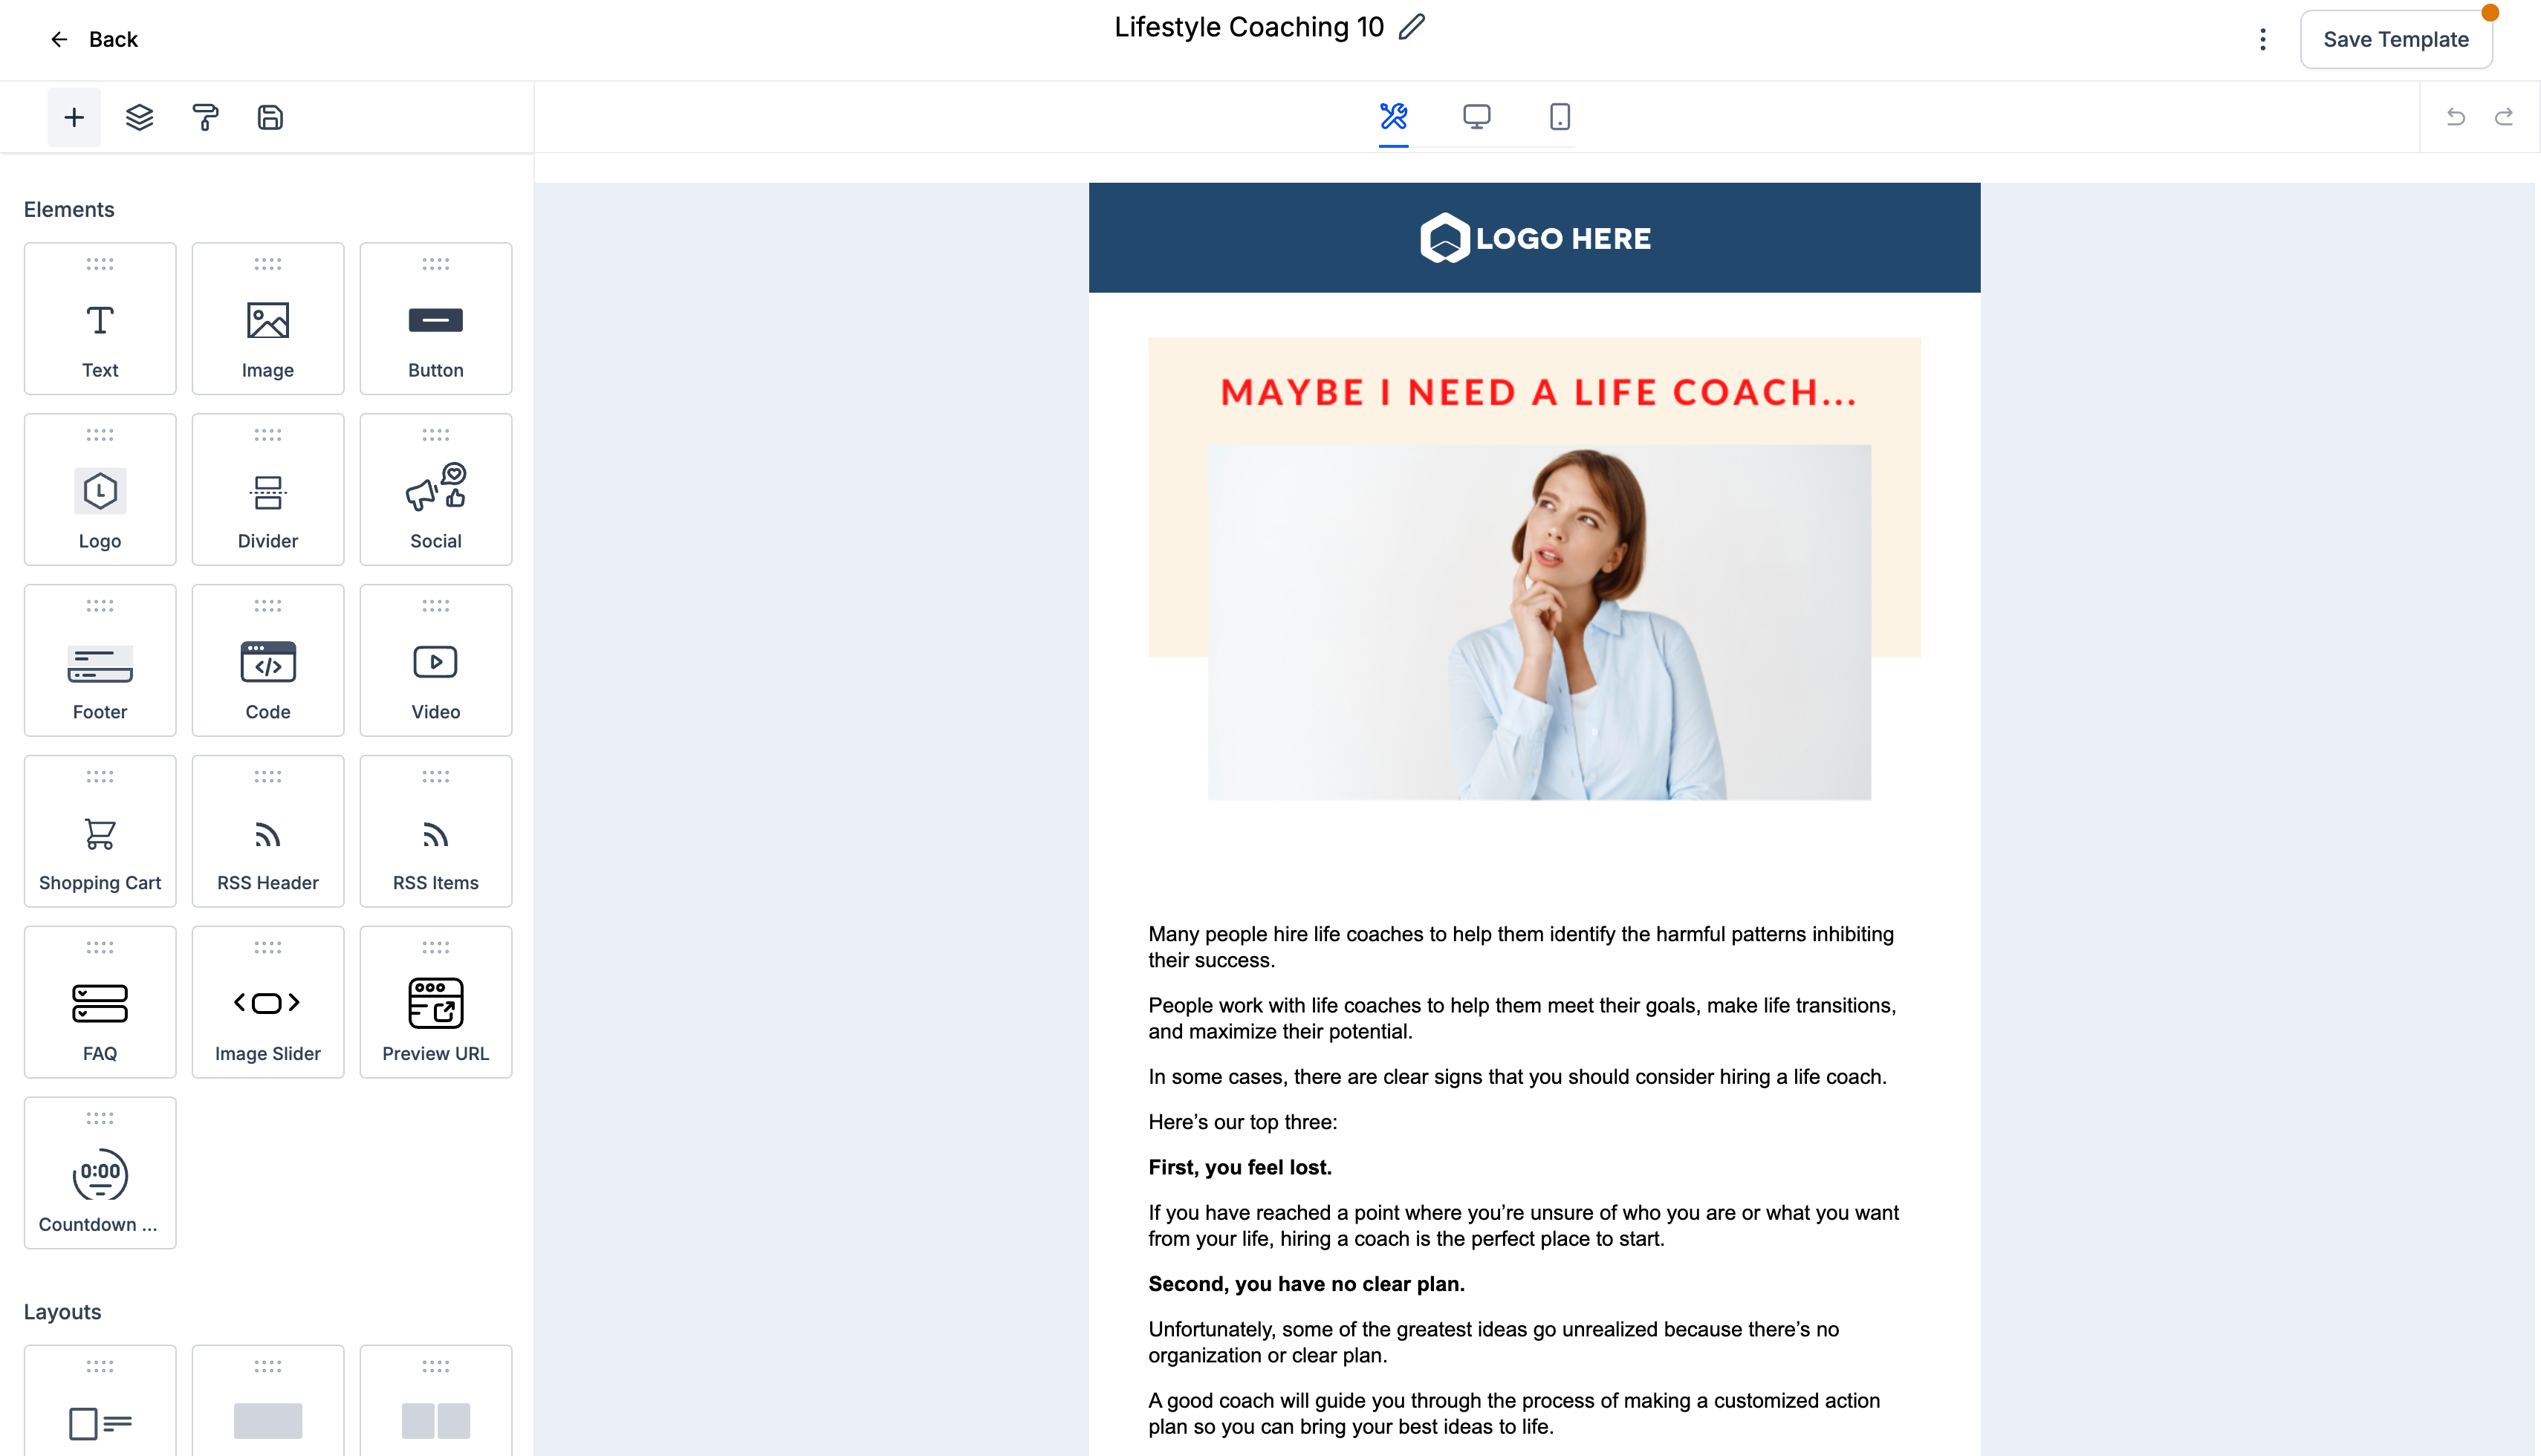
Once you choose a template, it opens in the email builder. The left panel is a set of elements you drag onto the canvas — Text, Image, Button, Logo, Divider, Social, Video, Countdown Timer, and more. Click any block to edit it inline: change the copy, swap an image, recolor a button. There's no code involved, and the toggle at the top lets you preview desktop and mobile so you can catch anything that breaks on a phone before you send.
A few things worth doing on every email:
•Keep it to one clear call to action — one button, one job
•Use a real logo block up top so it looks like you, not a generic template
•Check the mobile preview — more than half of your opens will be on a phone
Step 4: Turn it into a campaign
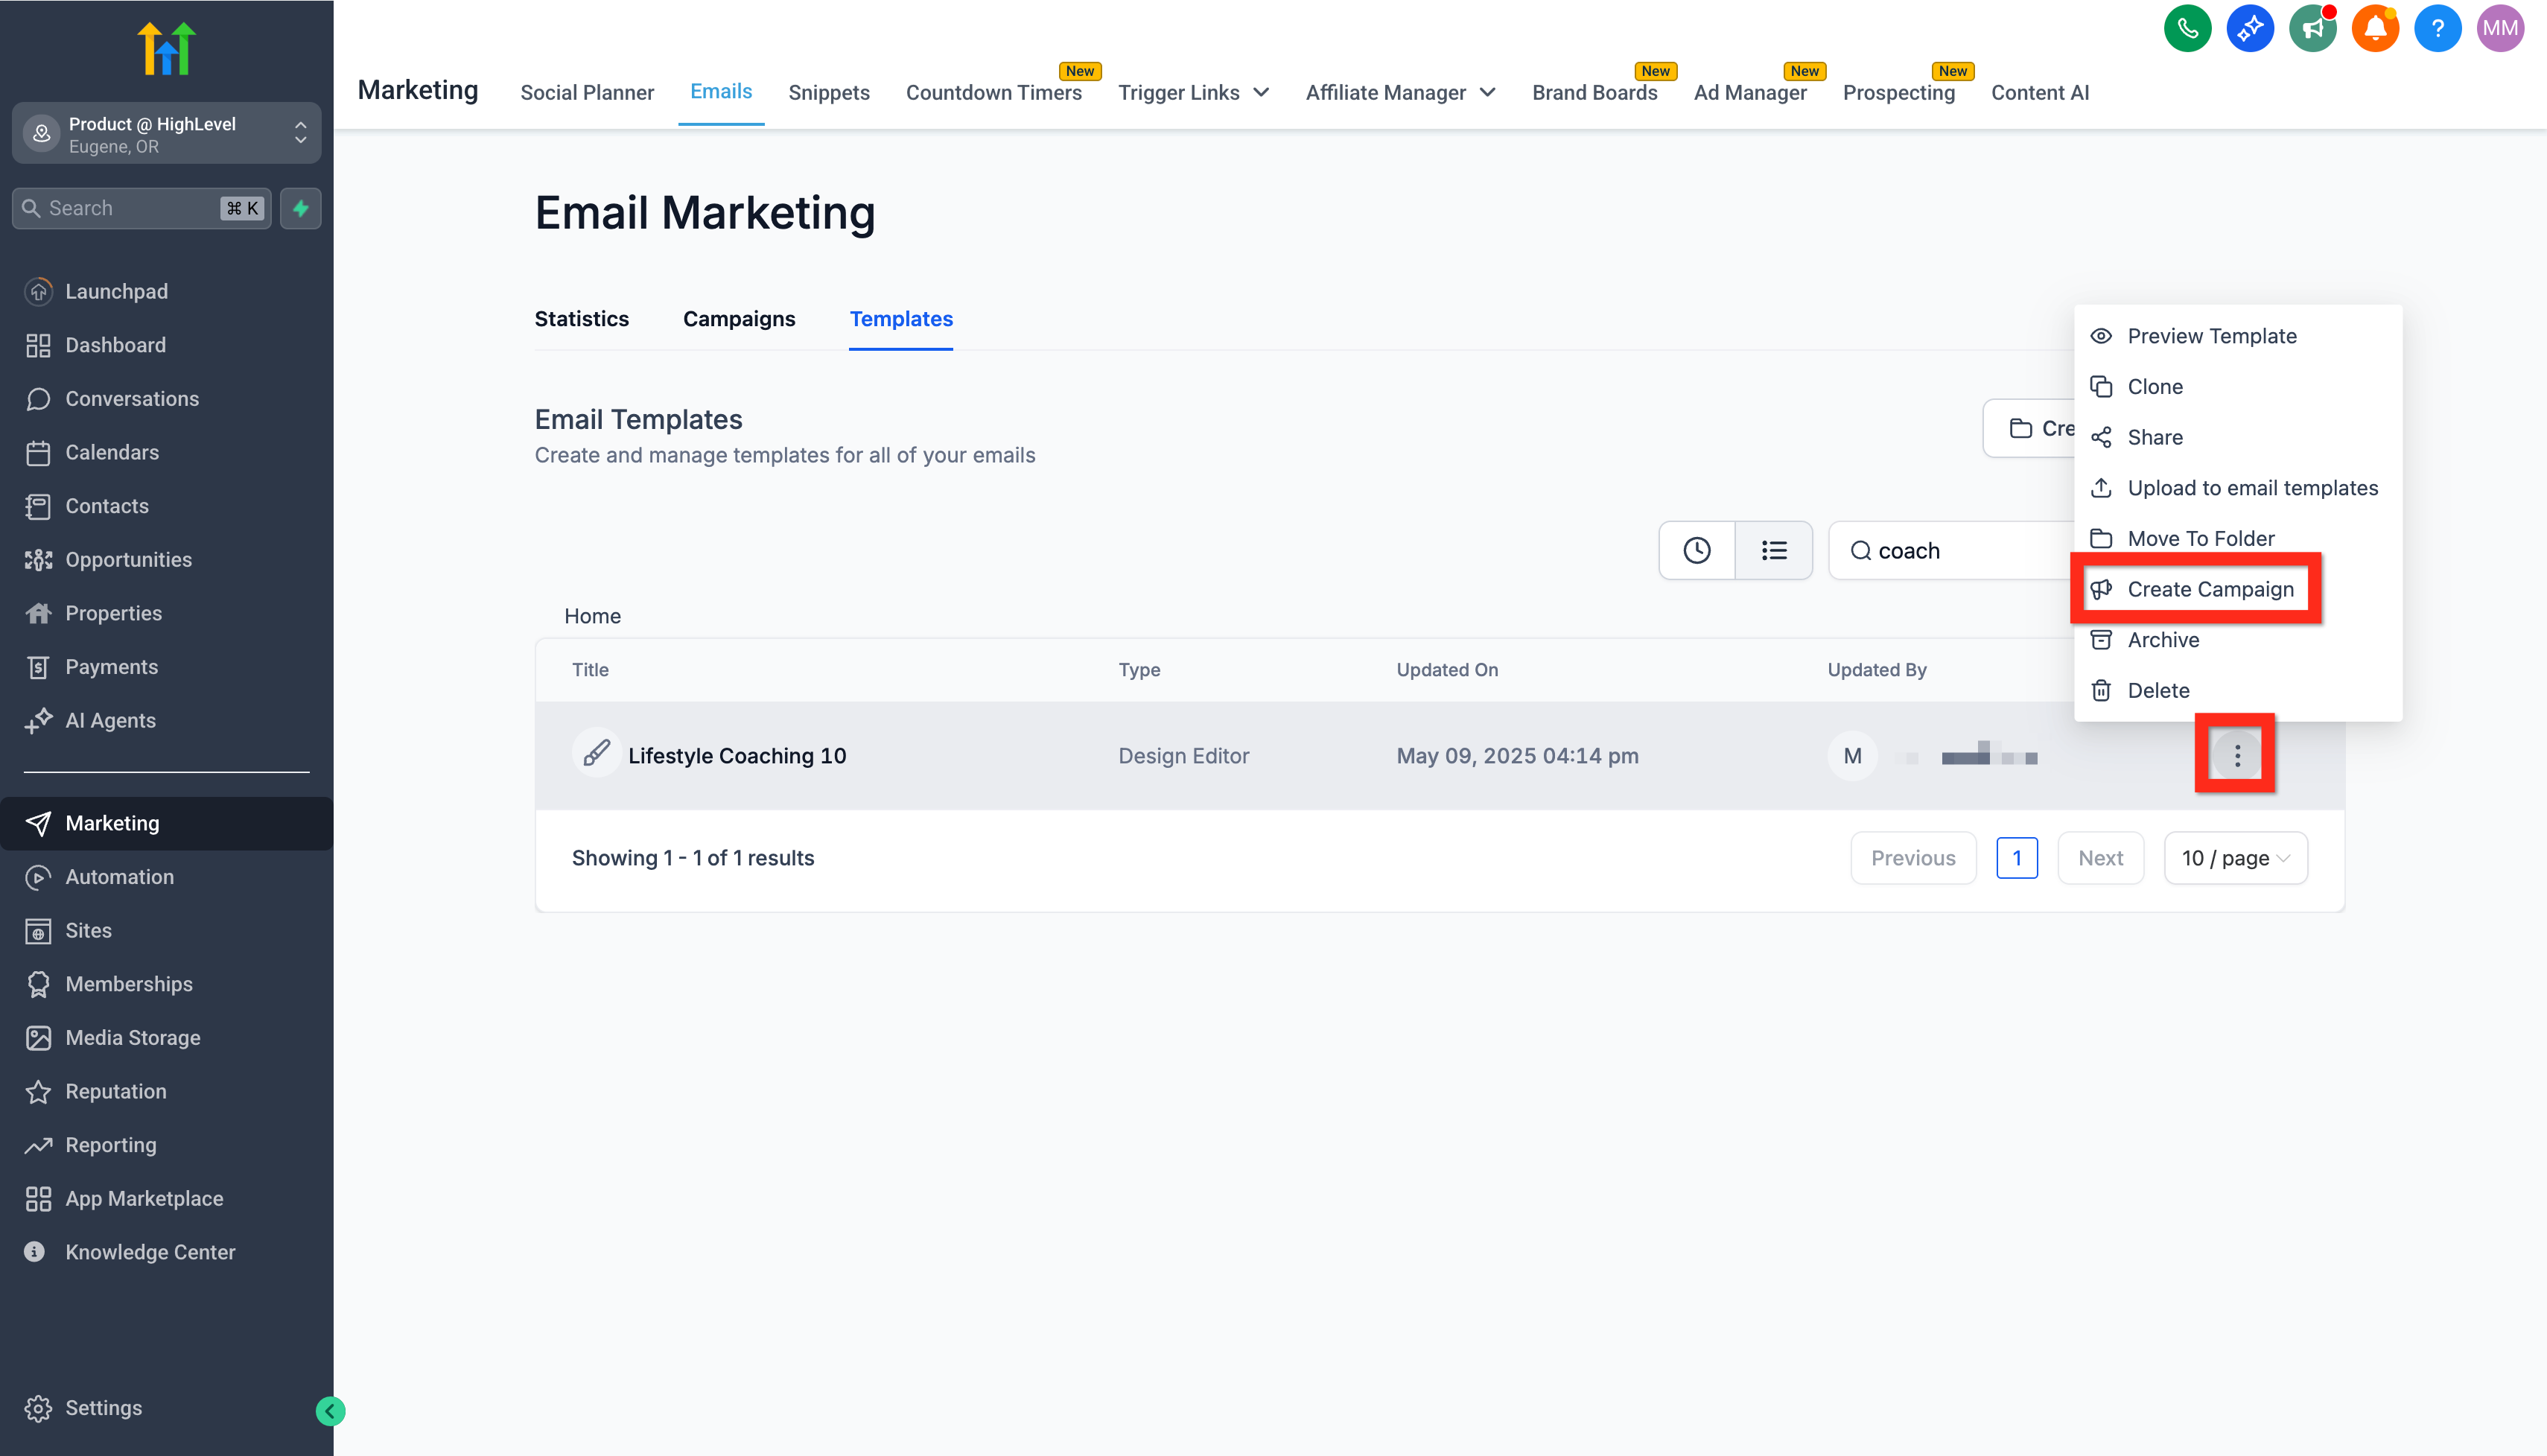
A template is just the design — a campaign is the actual send. From the template's menu, choose Create Campaign (you can also start under the Campaigns tab and attach a template). This is the moment you go from “what it looks like” to “who gets it and when,” so name it something you'll recognize later, like “July Newsletter” or “Fall Promo.”
Step 5: Set the sender, subject, and audience
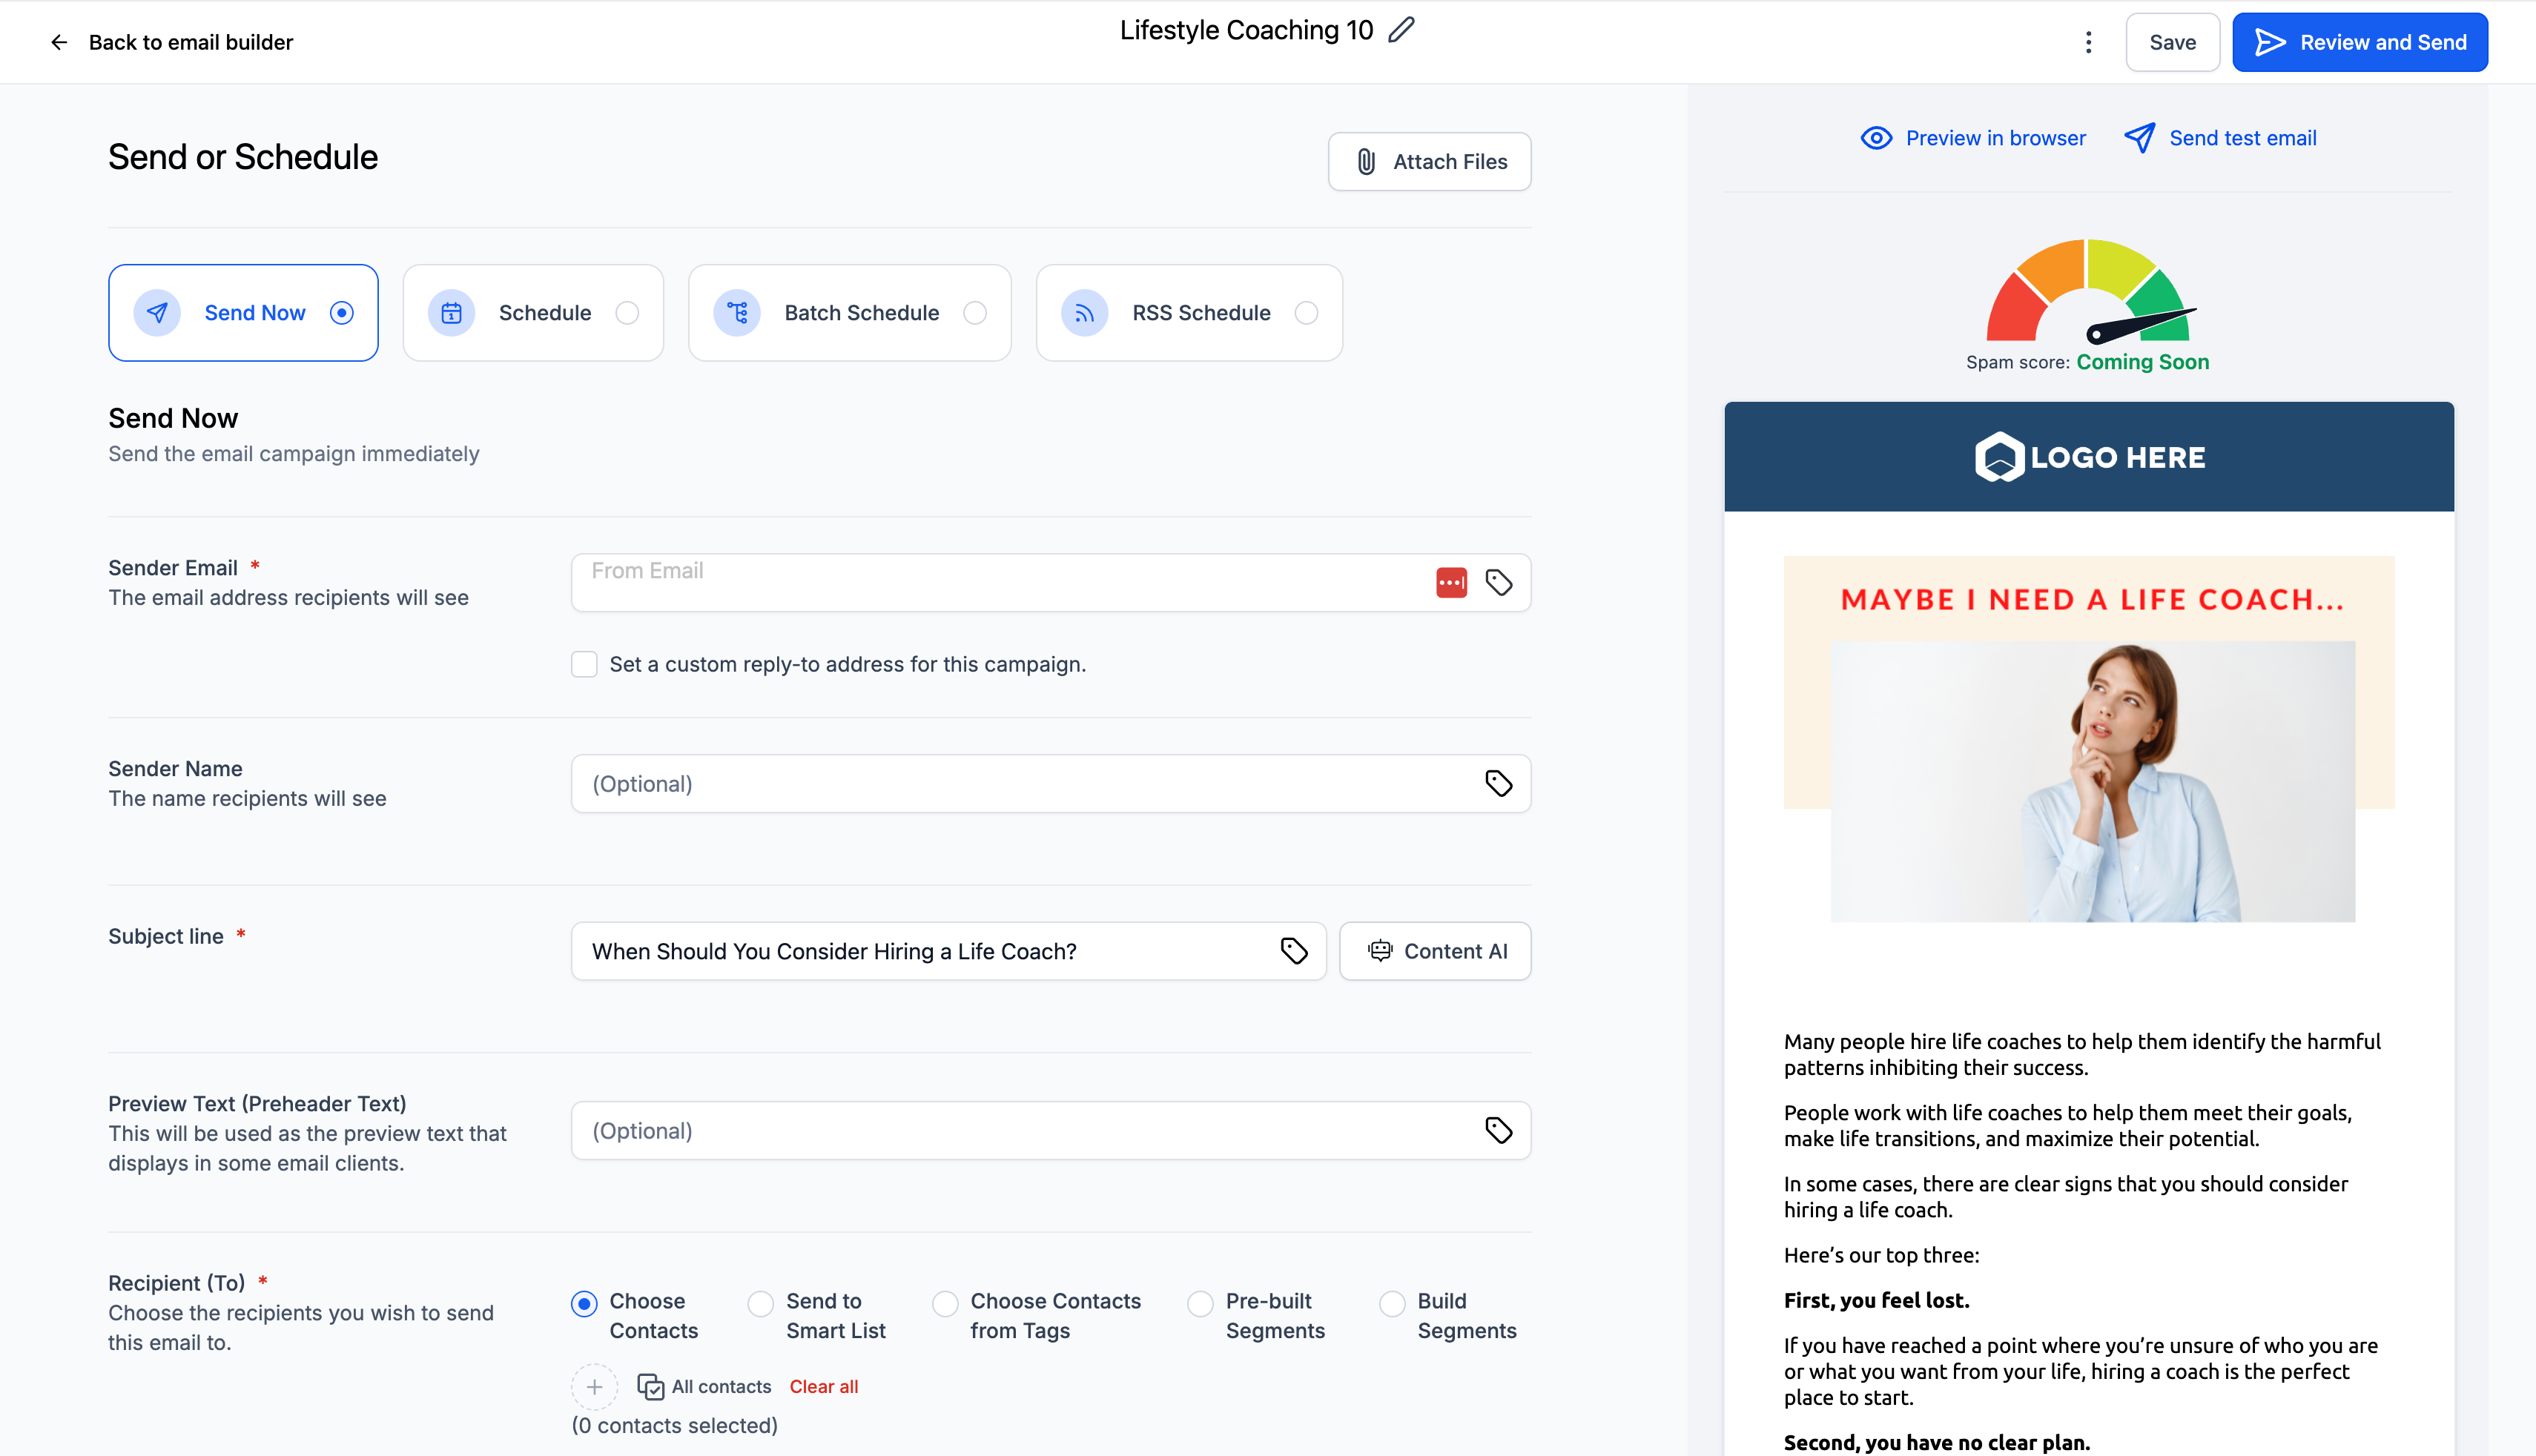
The Send or Schedule page is where the important choices live. You'll set the sender email and name recipients will see, write the subject line (the single biggest factor in whether the email gets opened — there's even a Content AI button to help), and add optional preview text. Then you choose your recipients: all contacts, a smart list, a tag, or a segment you build on the spot.
At the top you decide when: Send Now fires immediately, Schedule picks a future date and time, and Batch Schedule drips a large list out in waves so you don't spike your sending reputation. Send a test email to yourself first — always — then review and send.
Step 6: Read the stats
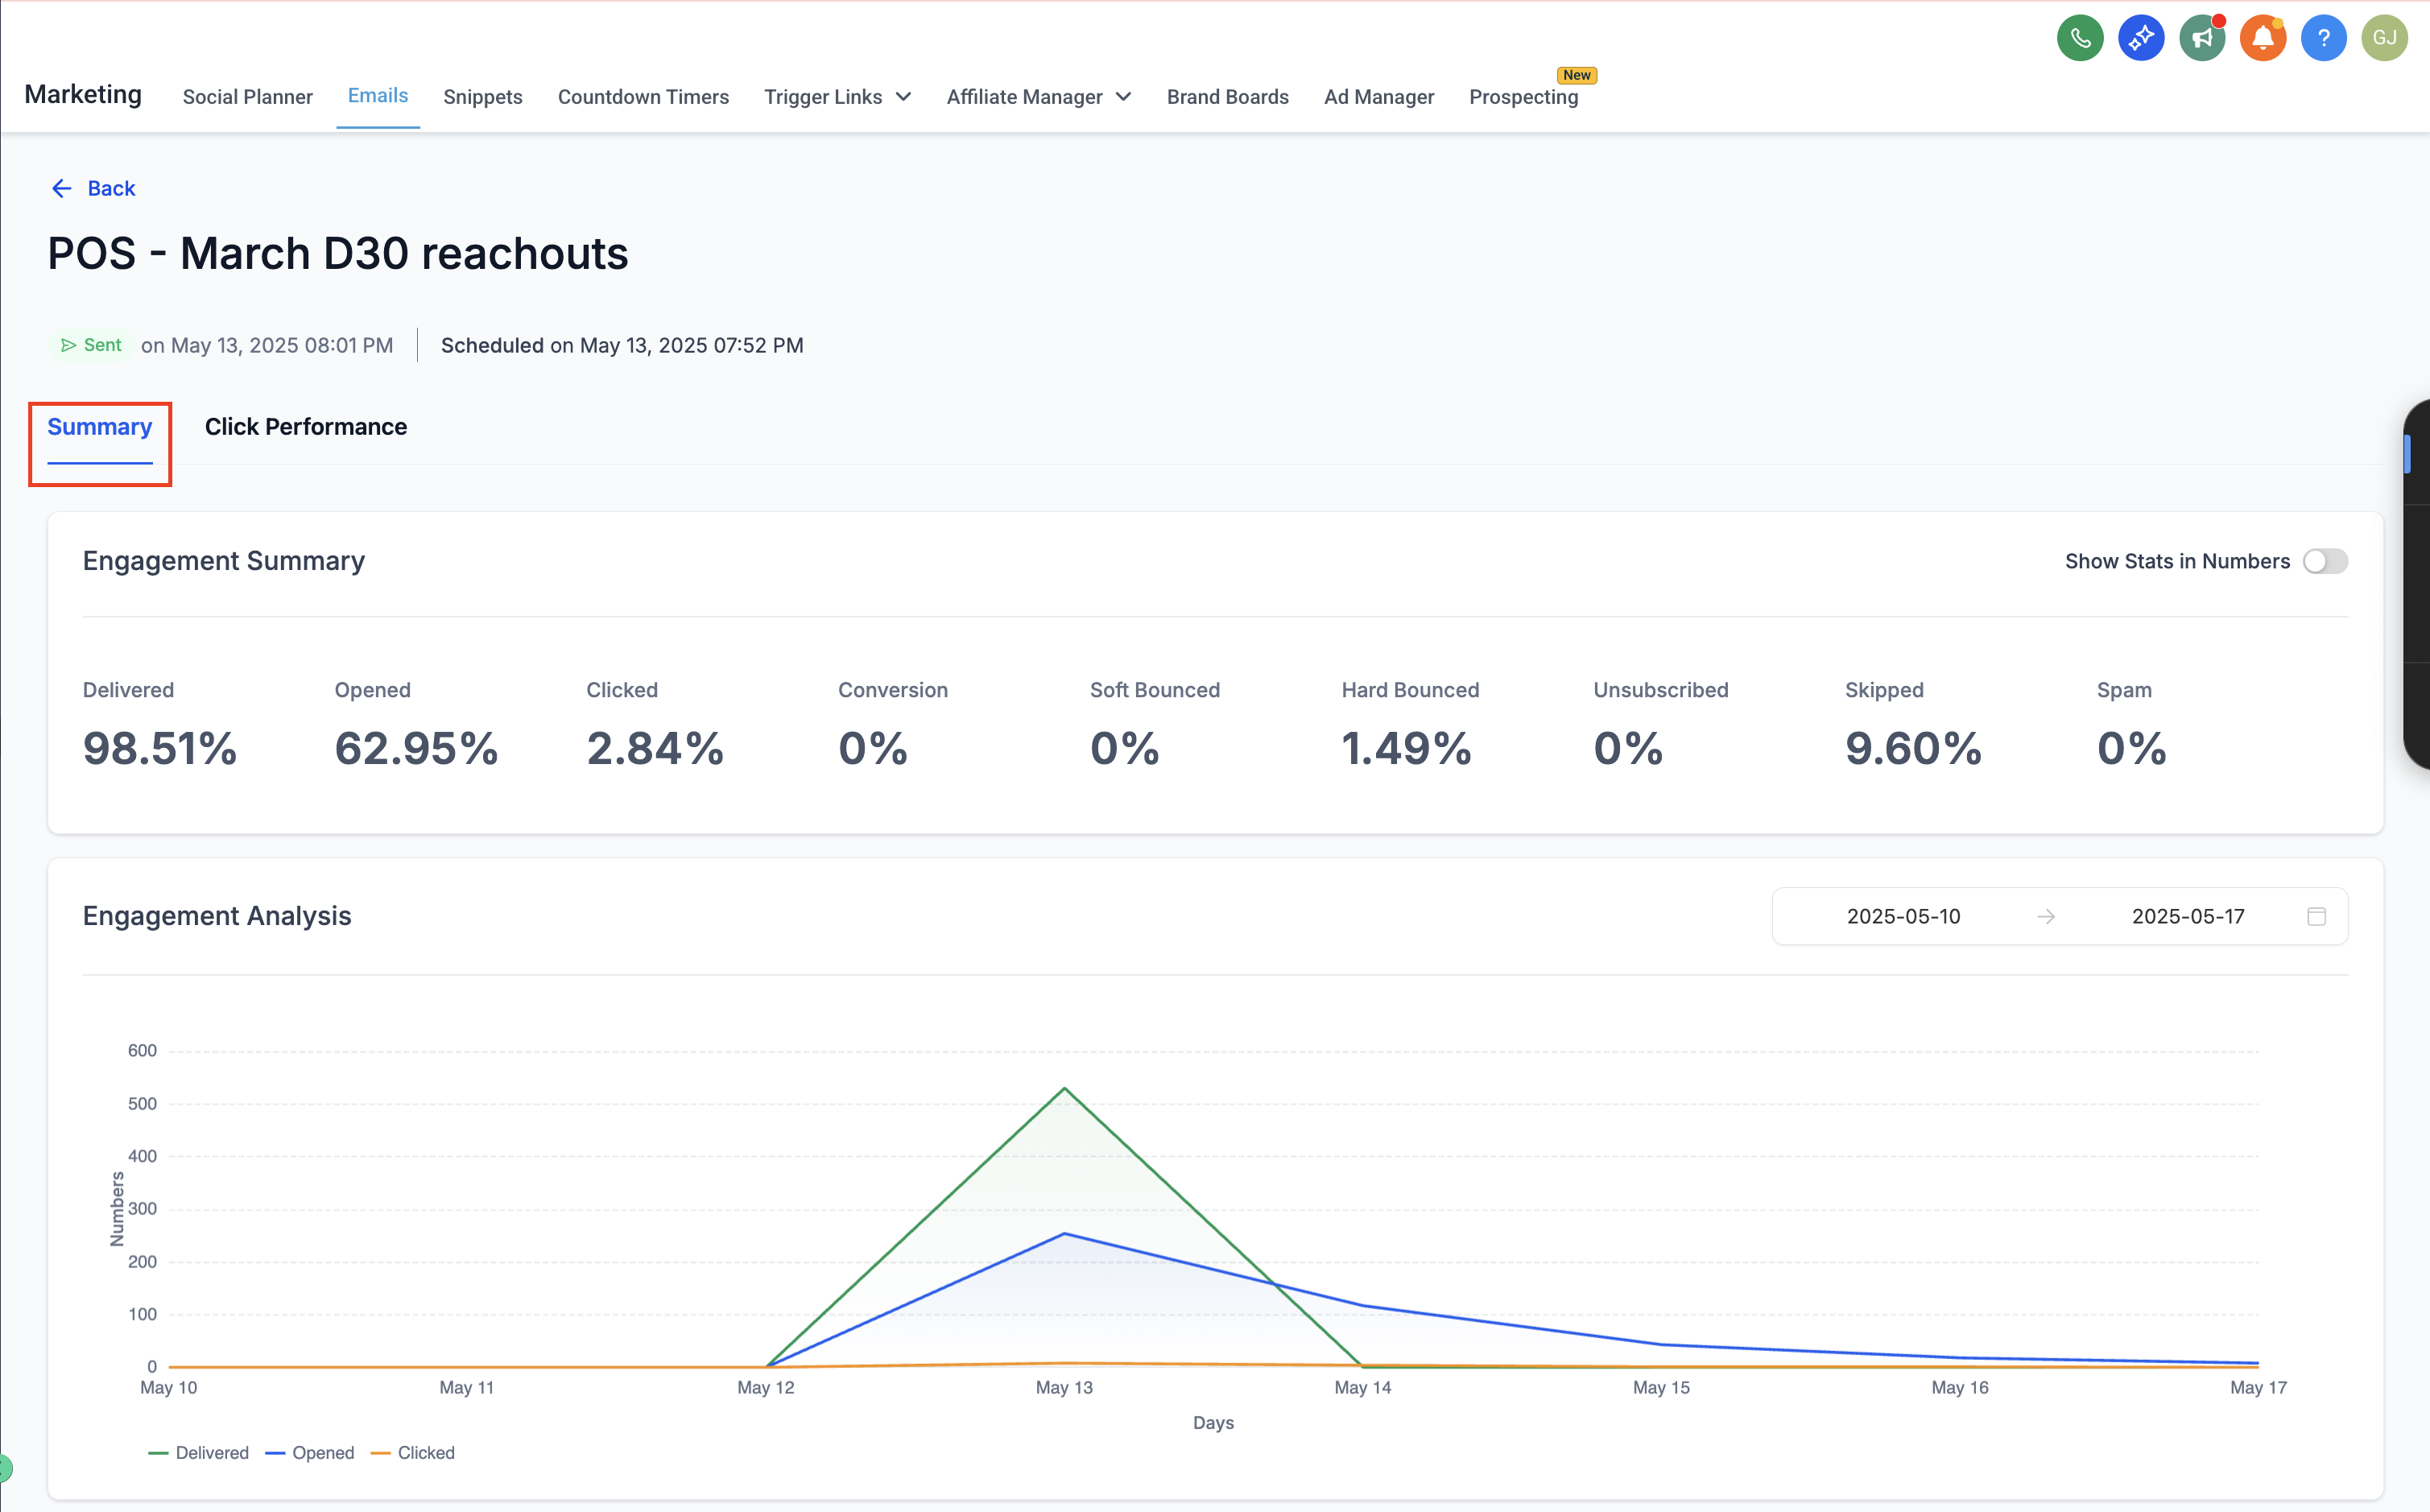
After it goes out, the Statistics tab (or the Summary on any sent campaign) tells you what actually happened: delivered, opened, clicked, plus bounces, unsubscribes, and spam complaints, with an engagement chart over time. A low open rate usually means the subject line or sender name needs work; a healthy open but low clicks means the offer or the button copy is the weak link. This is how each campaign teaches you what to change on the next one.
A few habits that pay off
Warm up gradually if your list is old, keep one clear message per email, clean out hard bounces so they don't drag your reputation down, and look at the numbers after every send rather than guessing. Done consistently, a simple monthly email to your existing contacts is one of the highest-return things a small business can do — and in GoHighLevel it lives right next to the rest of your customer data, so your audience is always up to date.
Need Expert Help with GoHighLevel?
New to GoHighLevel and ready to get started? Buy your GoHighLevel account here and launch with confidence.
Already know what you need and want our team to handle everything, from complete setup and customization to funnels, workflows, automations, CRM, and pipelines? Click here.