
How to Automate Lead Follow-Up in GoHighLevel
How to Automate Lead Follow-Up in GoHighLevel
Most leads aren't lost to competitors — they're lost to silence. A prospect fills out a form, nobody replies for a few hours, and by the time you call they've already booked someone else. Studies keep finding the same thing: the business that responds first usually wins. GoHighLevel lets you make that first response automatic, so every new lead gets a text and an email within seconds, day or night. Here's how to build that follow-up, step by step.
Step 1: Open the workflow builder
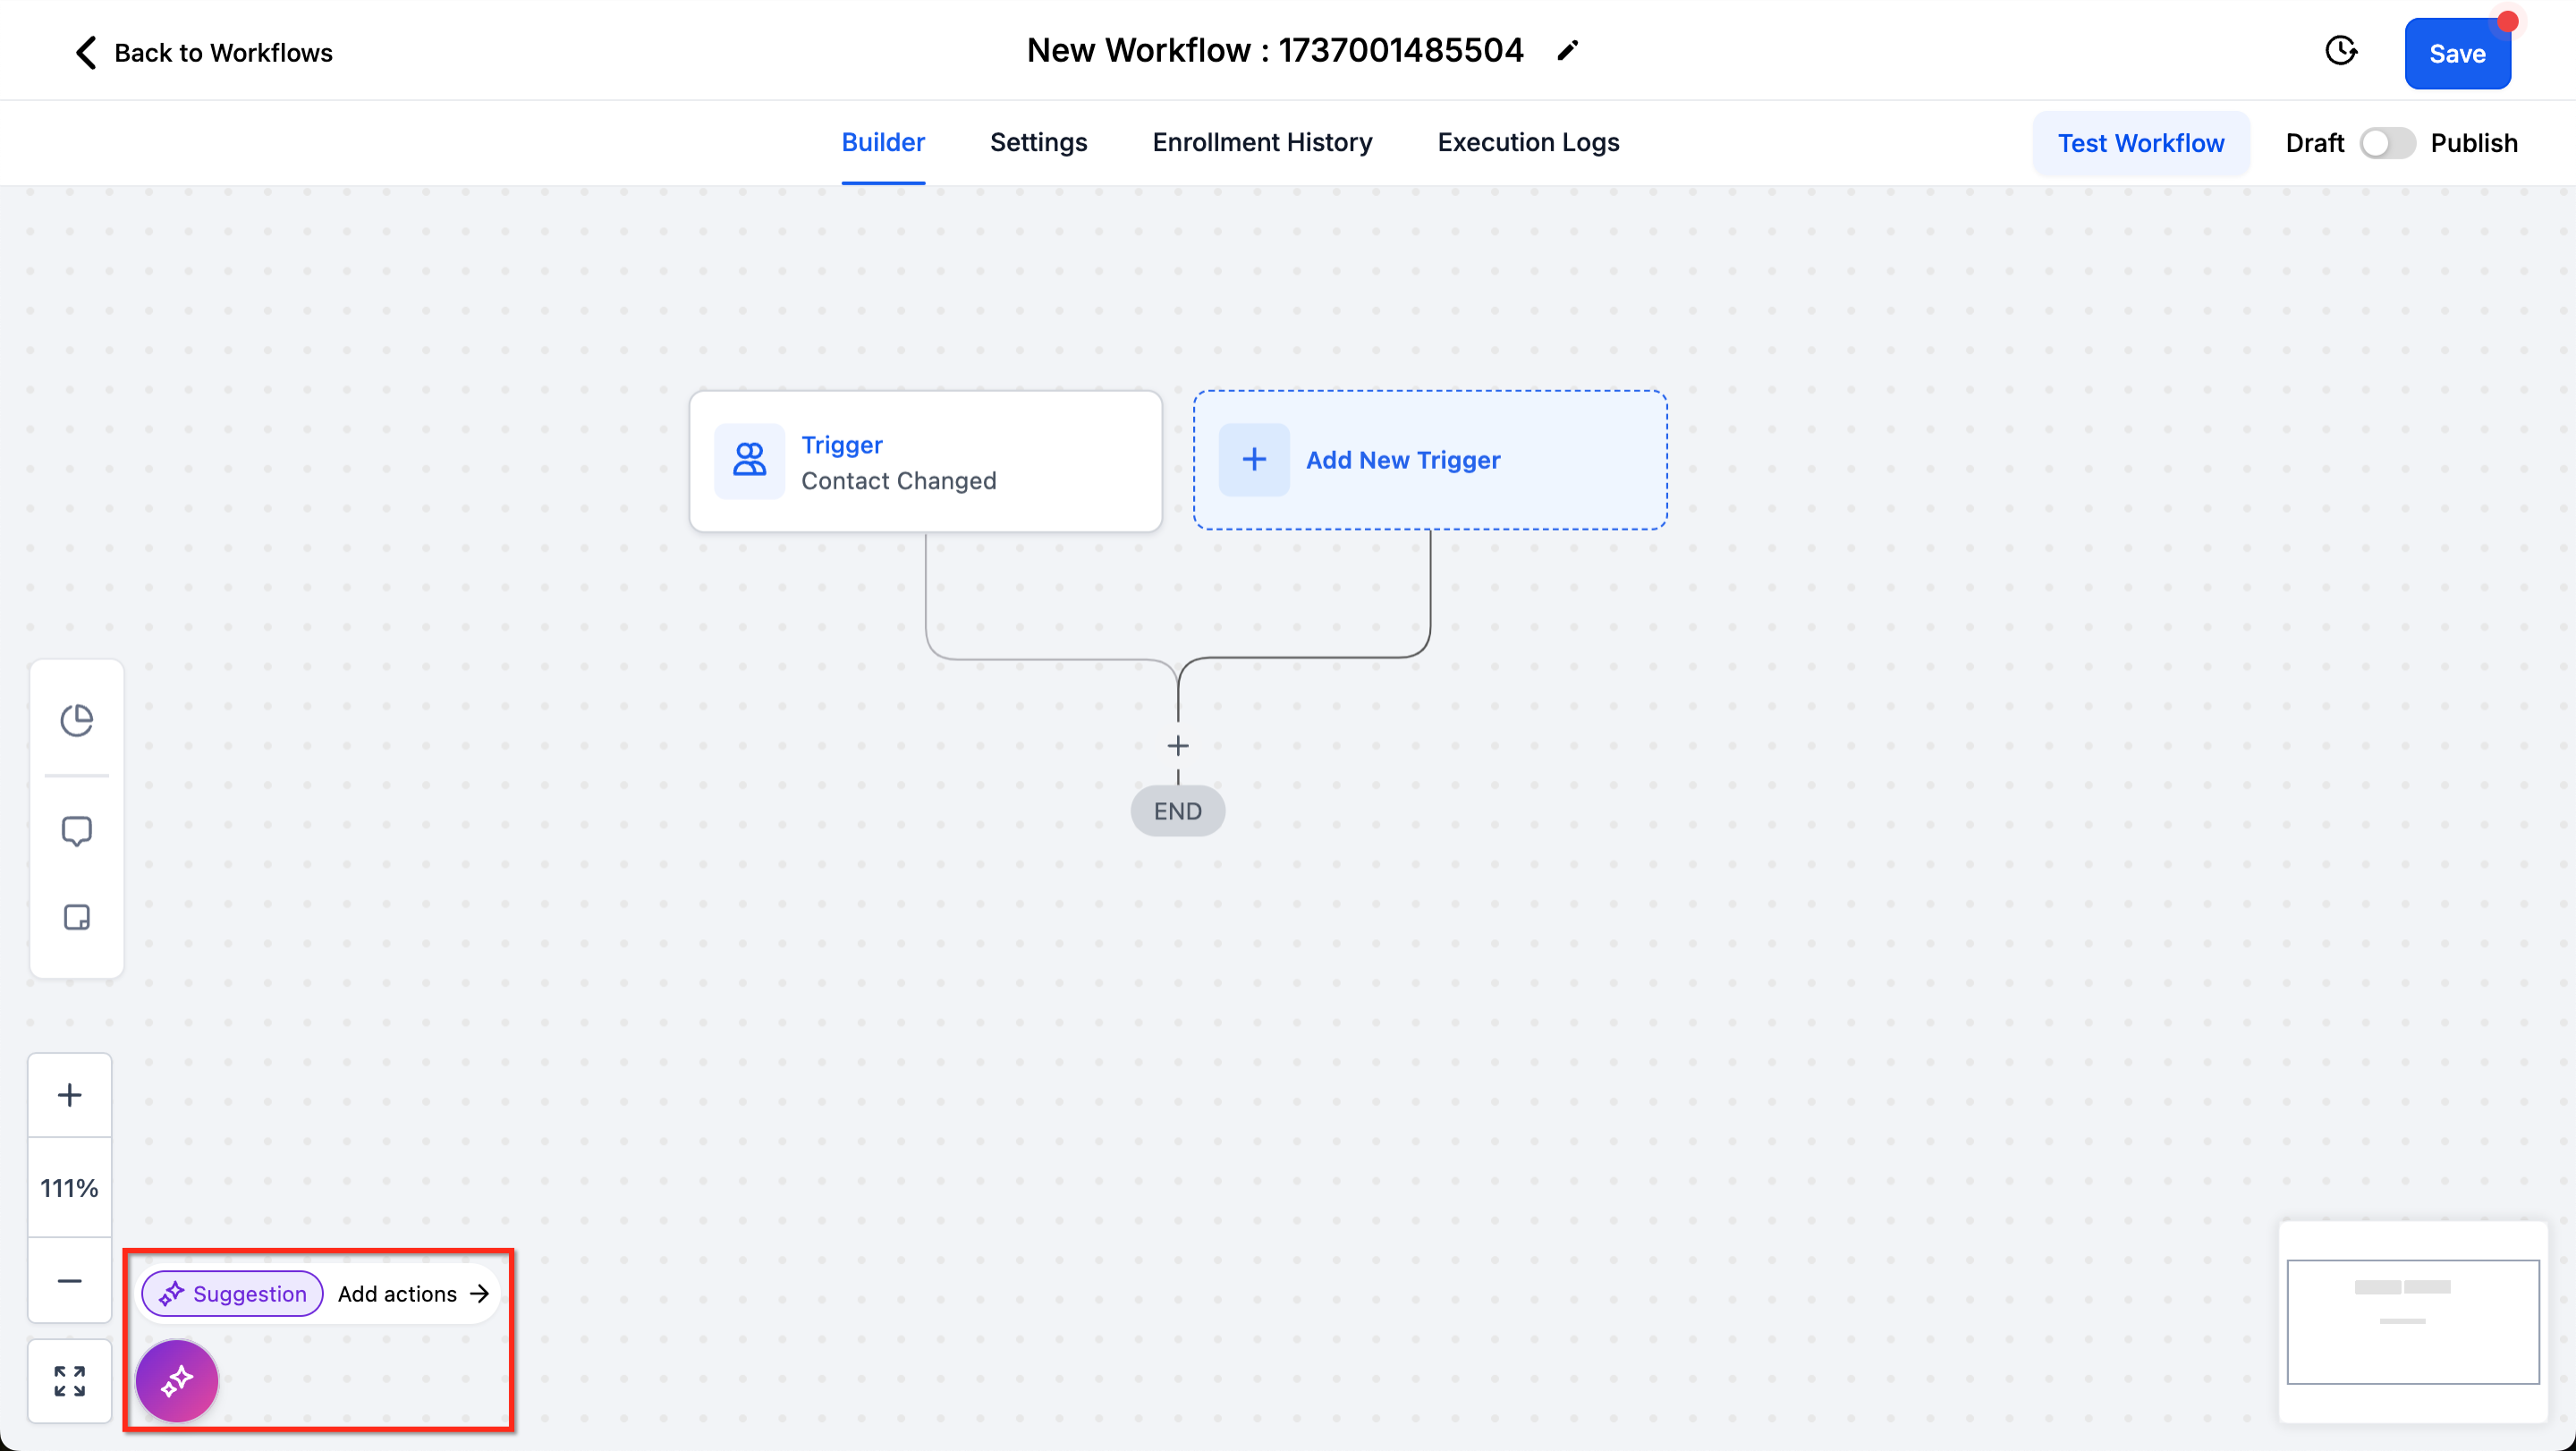
Automations live under Automation > Workflows. A workflow is just a chain: something happens (a trigger), then GoHighLevel does things in order (actions) — send a text, wait, send an email, notify you, move the deal forward. The canvas shows this top to bottom, starting with the trigger and ending at an END node. Once you've seen one, they all read the same way.
Step 2: Start from a recipe or from scratch
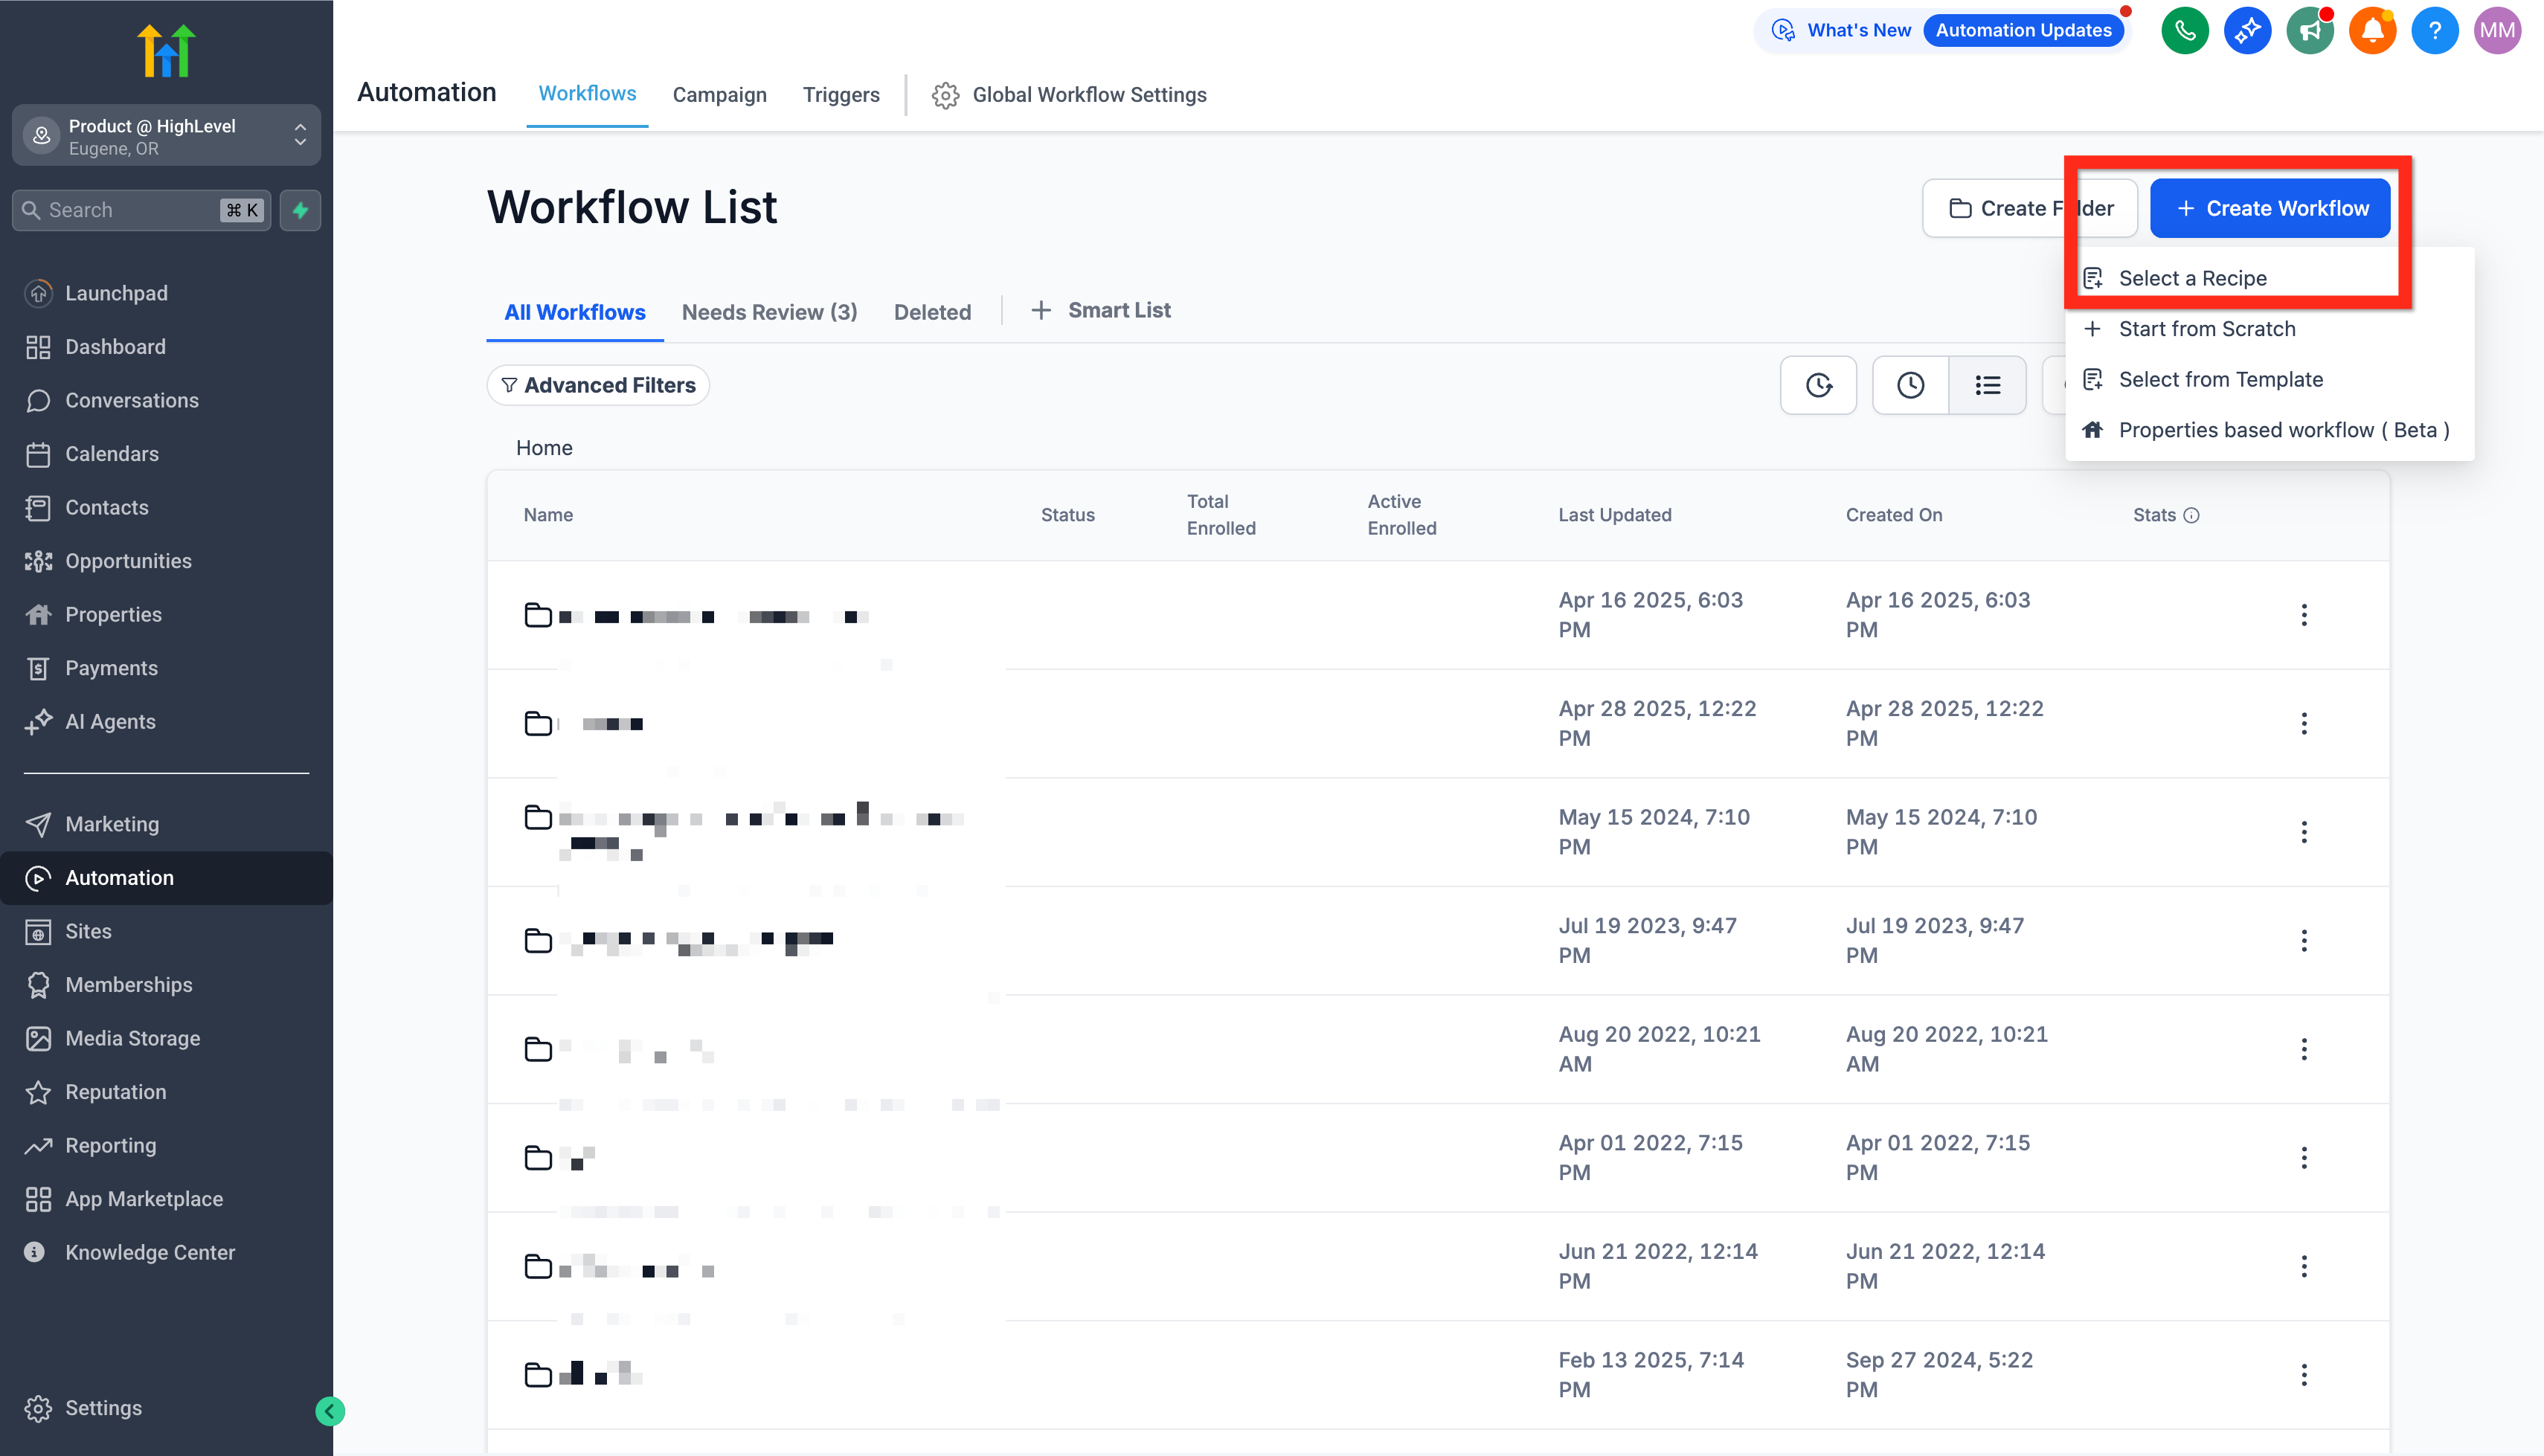
Click Create Workflow and you'll get a choice: Start from Scratch for full control, or Select a Recipe to begin with a pre-built follow-up sequence you can adjust. If you're new to this, a recipe is the faster path — it drops in a sensible trigger and a few actions, and you just change the wording and timing. Either way you land on the same builder.
Step 3: Choose what starts the follow-up
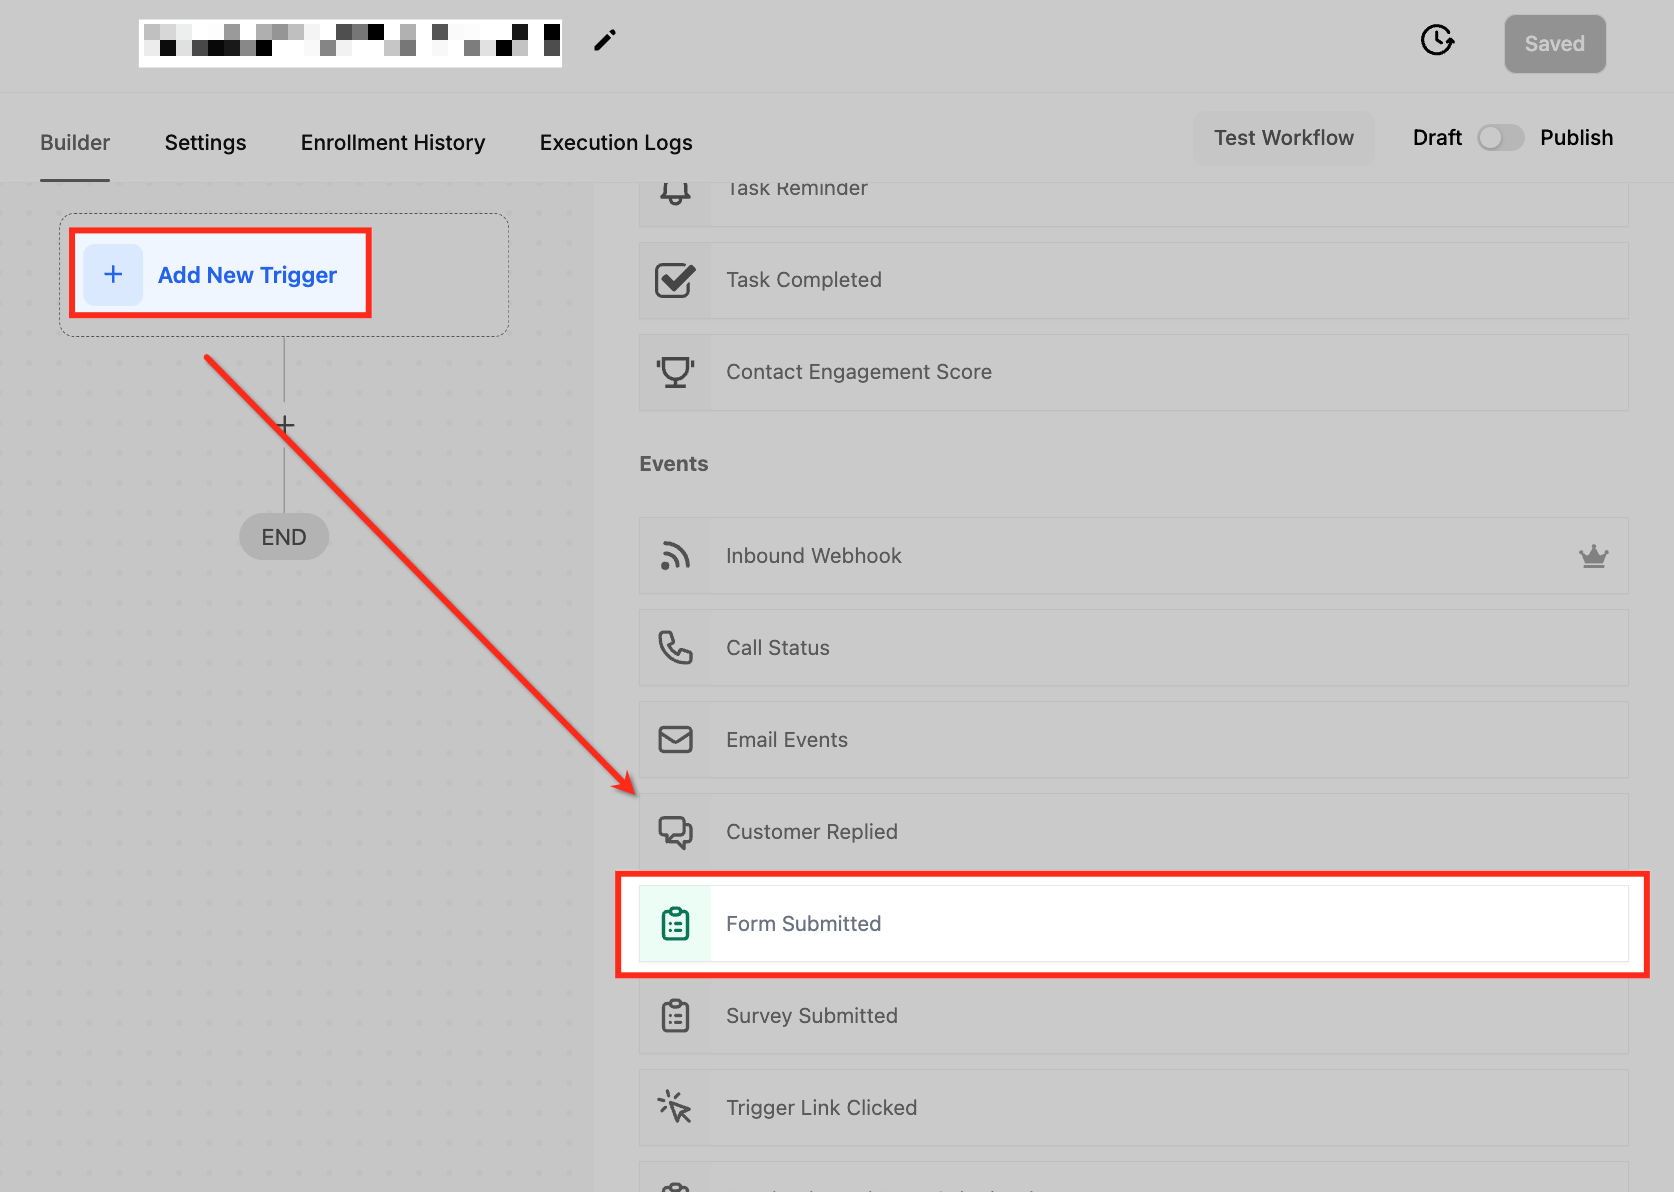
Click Add New Trigger and pick what kicks things off. For lead follow-up the common ones are Form Submitted, Facebook/Instagram Lead Form Submitted, Customer Replied, or an inbound call. Selecting Form Submitted means the moment anyone completes your form, they're enrolled and the follow-up begins — no one has to notice the lead or remember to act on it.
Step 4: Point the trigger at the right form
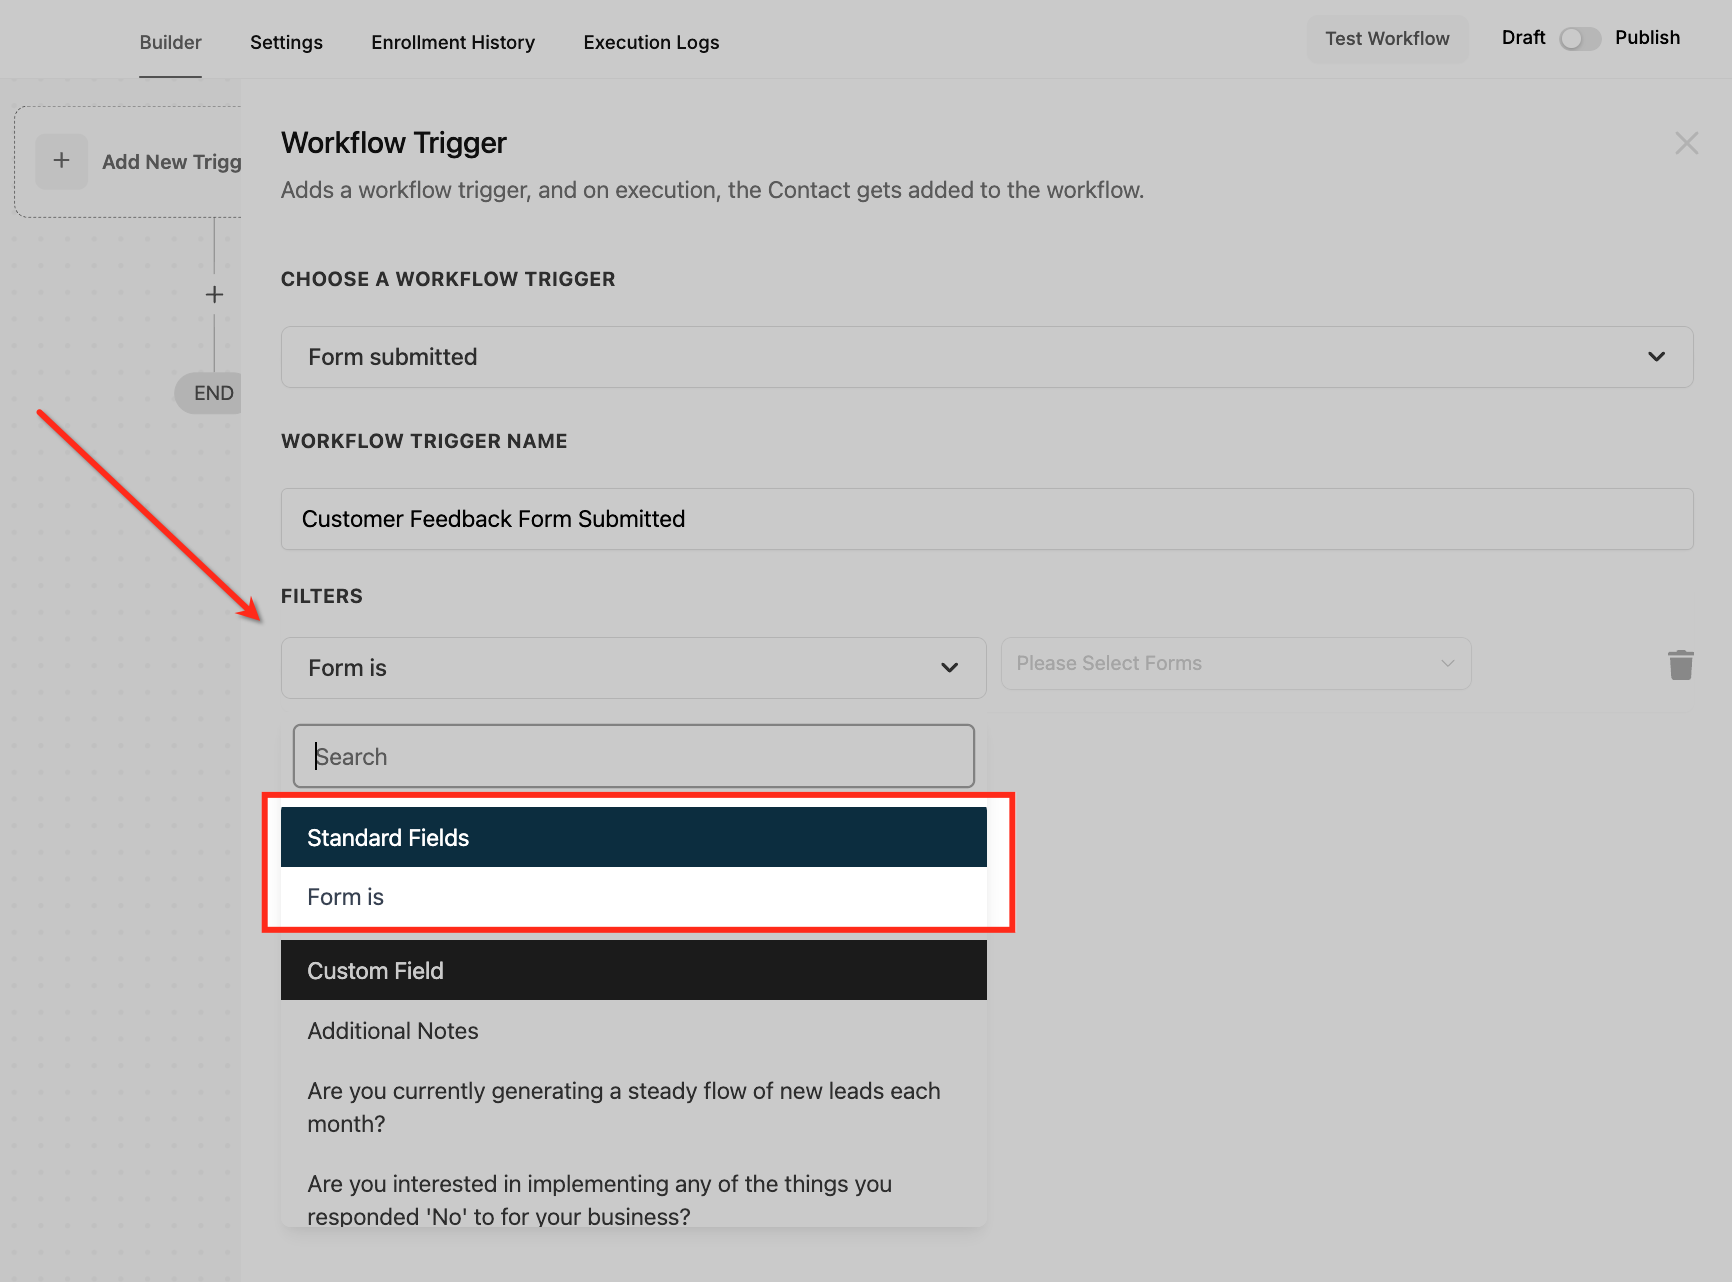
A trigger on its own would fire for every form on your account, so you add a filter to narrow it. Give the trigger a clear name (like “New Lead — Contact Form”), then set the filter Form is and choose the specific form. Now only that form starts this particular sequence, which matters once you're running several — a contact form and a booking form usually deserve different follow-ups.
Step 5: Add your follow-up steps
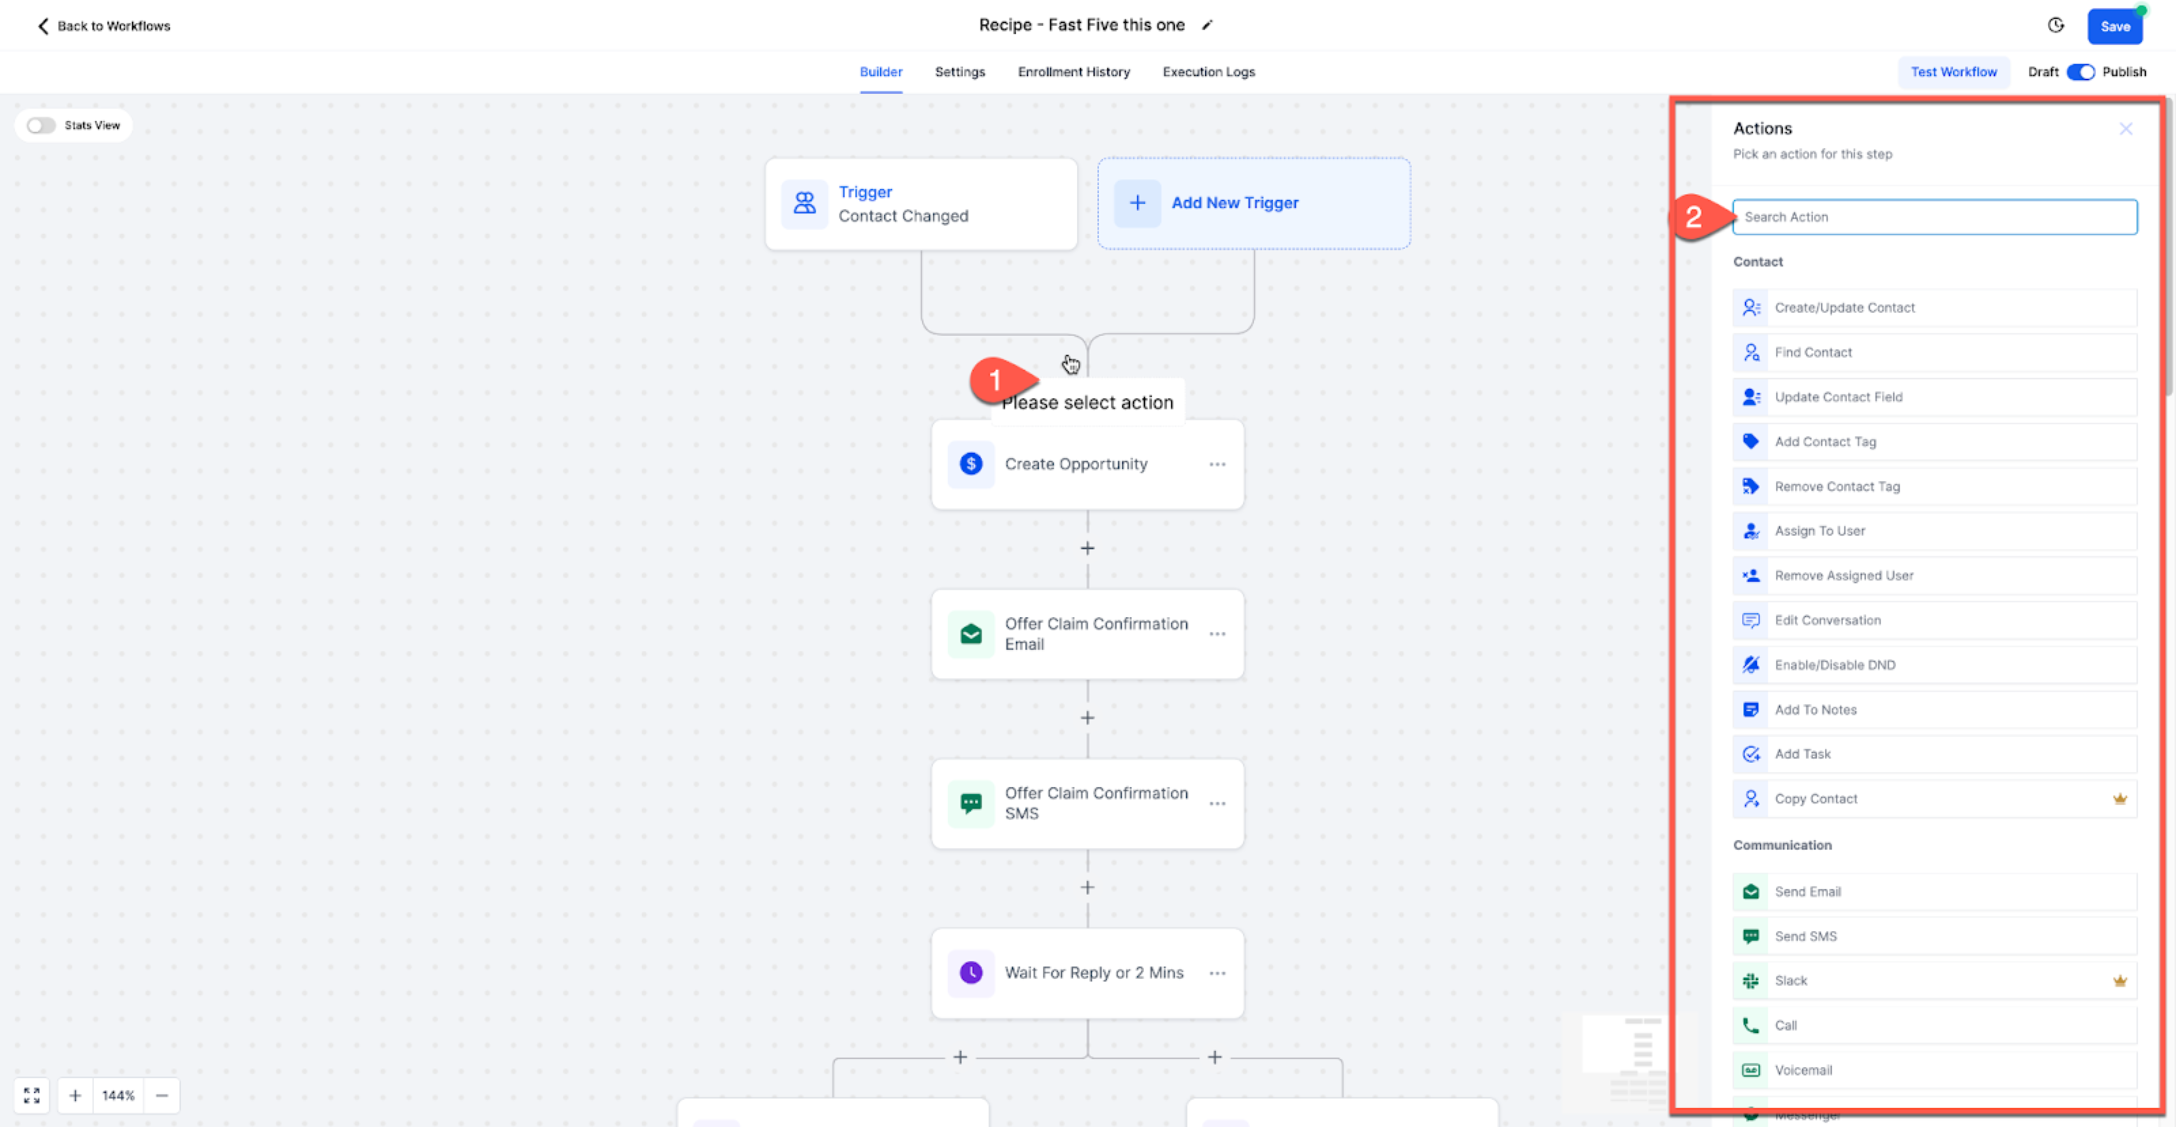
Now click the plus under the trigger to add actions. A follow-up that works well for most businesses looks like this:
•Send SMS immediately: “Hi {{contact.first_name}}, thanks for reaching out to Wispcode! I'll call you shortly — is this the best number?”
•Send Email right after, with a bit more detail and a booking link
•Wait 10 minutes, then notify you or your team internally
•Wait a day or two, then a gentle SMS nudge if they haven't replied
Each action is a block you pick from the Actions panel — Send SMS, Send Email, Wait, Add Contact Tag, Assign to User, and many more. Stack them in the order you want them to run.
Step 6: Move the lead down the pipeline
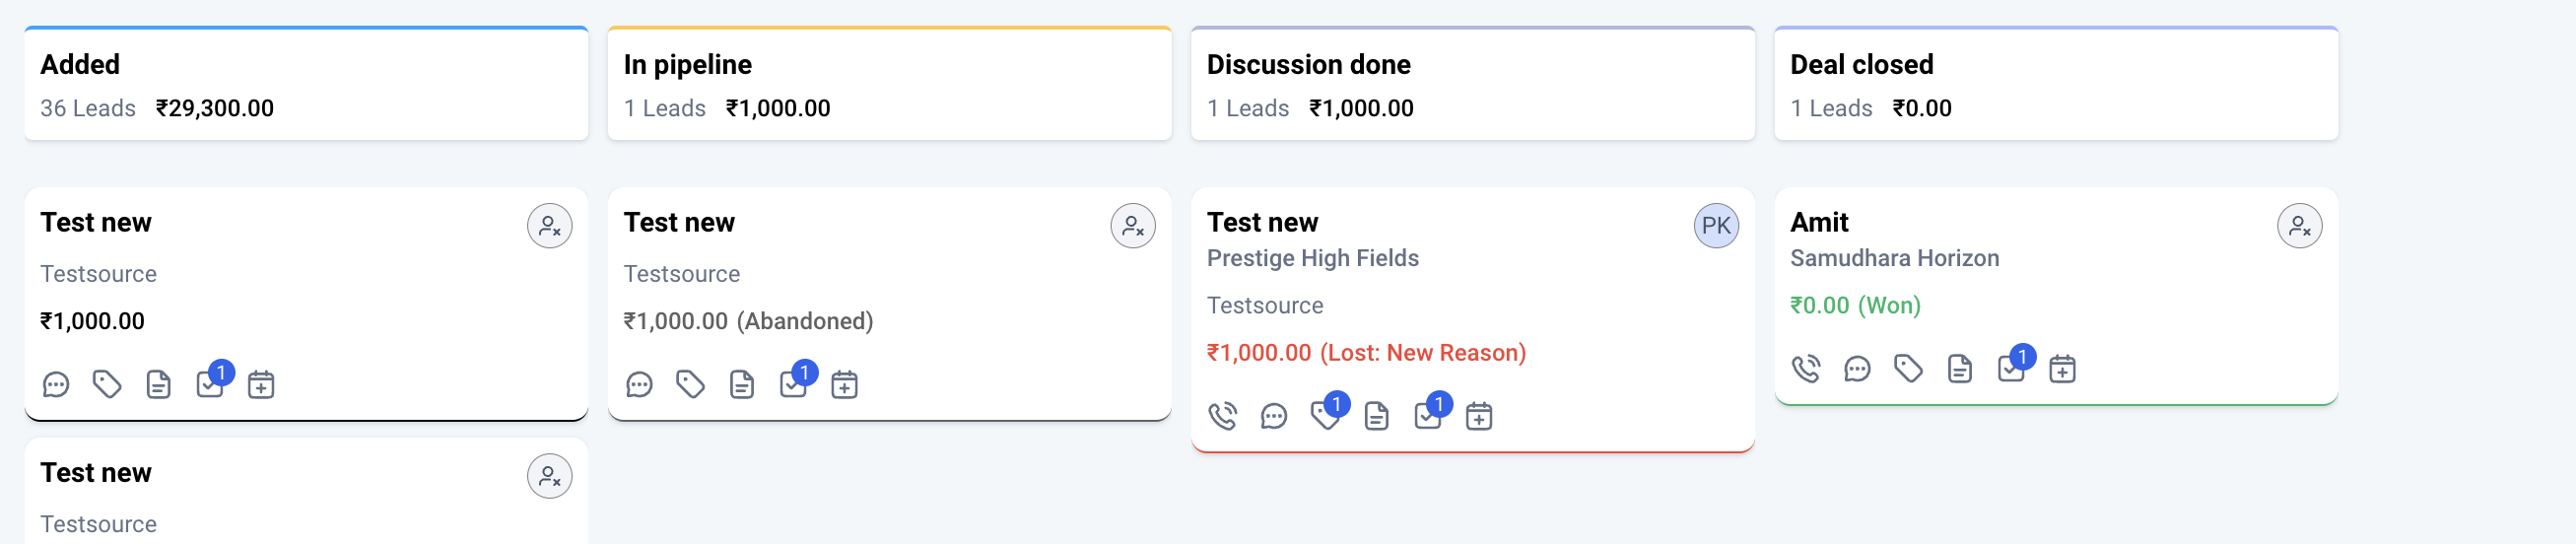
The last piece ties the automation back to your sales tracking. Add a Create/Update Opportunity action so a new lead automatically lands in the right pipeline at the “New Lead” stage — and later steps can move it to “Contacted” or “Booked” on their own. Now your Opportunities board reflects reality without anyone dragging cards around, and you can see at a glance where every lead sits.
Getting the timing right
Speed matters most on the very first touch, so keep the first SMS and email instant. After that, space things out so you're persistent without being annoying — a nudge the next day, another a few days later, then ease off. Always give people an easy way to reply or opt out, and make sure a real person takes over the moment someone responds; the automation's job is to buy you that time, not to replace the conversation. Publish the workflow with the toggle in the top corner, send a test lead through it, and from then on every inquiry gets an instant, consistent response.
Need Expert Help with GoHighLevel?
New to GoHighLevel and ready to get started? Buy your GoHighLevel account here and launch with confidence.
Already know what you need and want our team to handle everything, from complete setup and customization to funnels, workflows, automations, CRM, and pipelines? Click here.