
GoHighLevel Send Email Action for Personalized Automation
How to Deliver Personalized Customer Communications Using the Send Email Action in GoHighLevel
Introduction
Email is still an important part of many customer journeys. Whether you are confirming an appointment, following up with a new lead, sharing an update, or sending information after a purchase, the timing and relevance of the message can have a major impact on the customer experience.
GoHighLevel's Send Email action allows businesses to send automated emails from inside a workflow. The action can be used for personalized communication, follow-ups, confirmations, updates, and notifications. HighLevel also supports personalization through custom values, allowing information such as a contact's first name or appointment details to be included in the email.
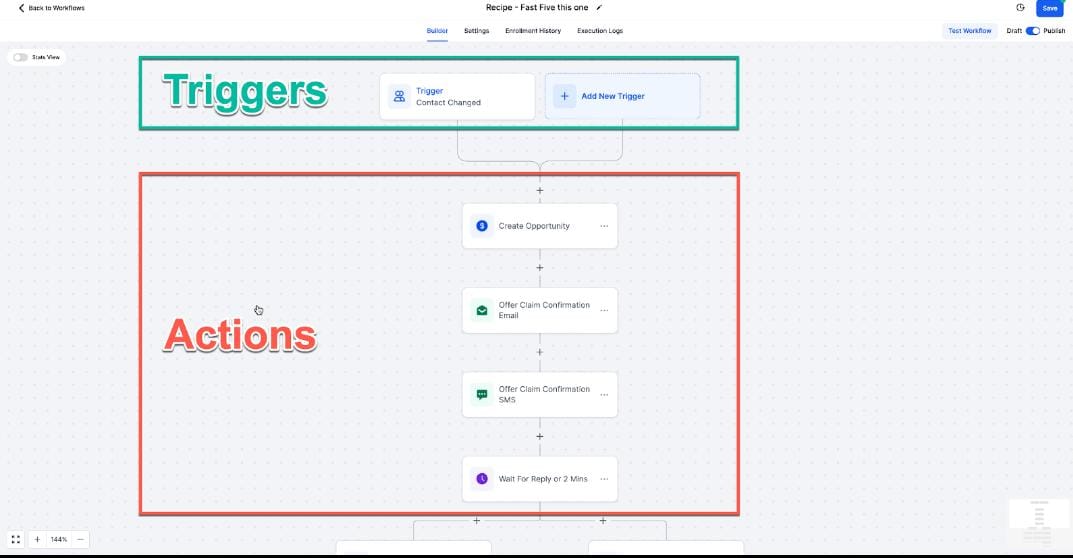
Because the action is part of the Workflow Builder, an email can be sent automatically when the workflow reaches that step. This means businesses can connect email communication directly to events in their customer journey instead of relying on someone to send each message manually.
What Is the Send Email Action?
The Send Email action is a GoHighLevel workflow action that sends an email to a contact when the workflow reaches that step. HighLevel lists it as a Communication Workflow Action and describes it as a way to automate personalized email communication, follow-ups, updates, and notifications.
The action can be used after many different workflow triggers.
For example, a business could start a workflow when someone submits a form, books an appointment, or completes another relevant action. The Send Email step can then deliver the appropriate message automatically.
This makes the action useful for both simple and more advanced customer journeys.
How to Add the Send Email Action
To start, open Automation > Workflows in your GoHighLevel account and create a new workflow or open an existing one.
Configure the trigger that should start your automation.
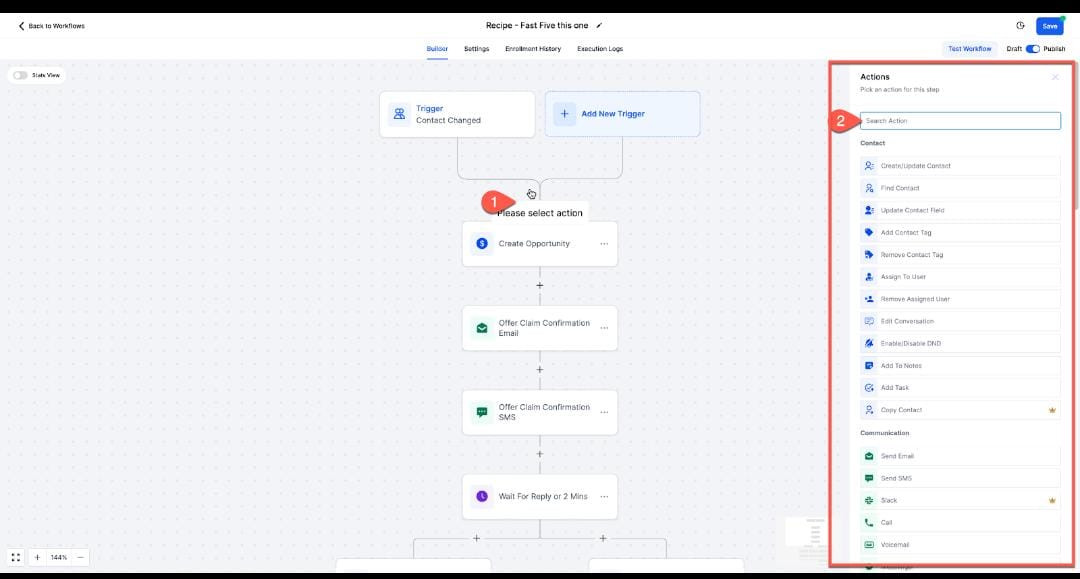
Once your trigger is ready, click the plus (+) button where you want the email to be sent.
Search for Send Email and select the action.
HighLevel's current workflow documentation explains that the action can be added after a trigger, such as a booking or form submission.
After adding it, you can configure the email's sender information, subject, message, template, attachments, and other available settings.
Configure the Sender Information
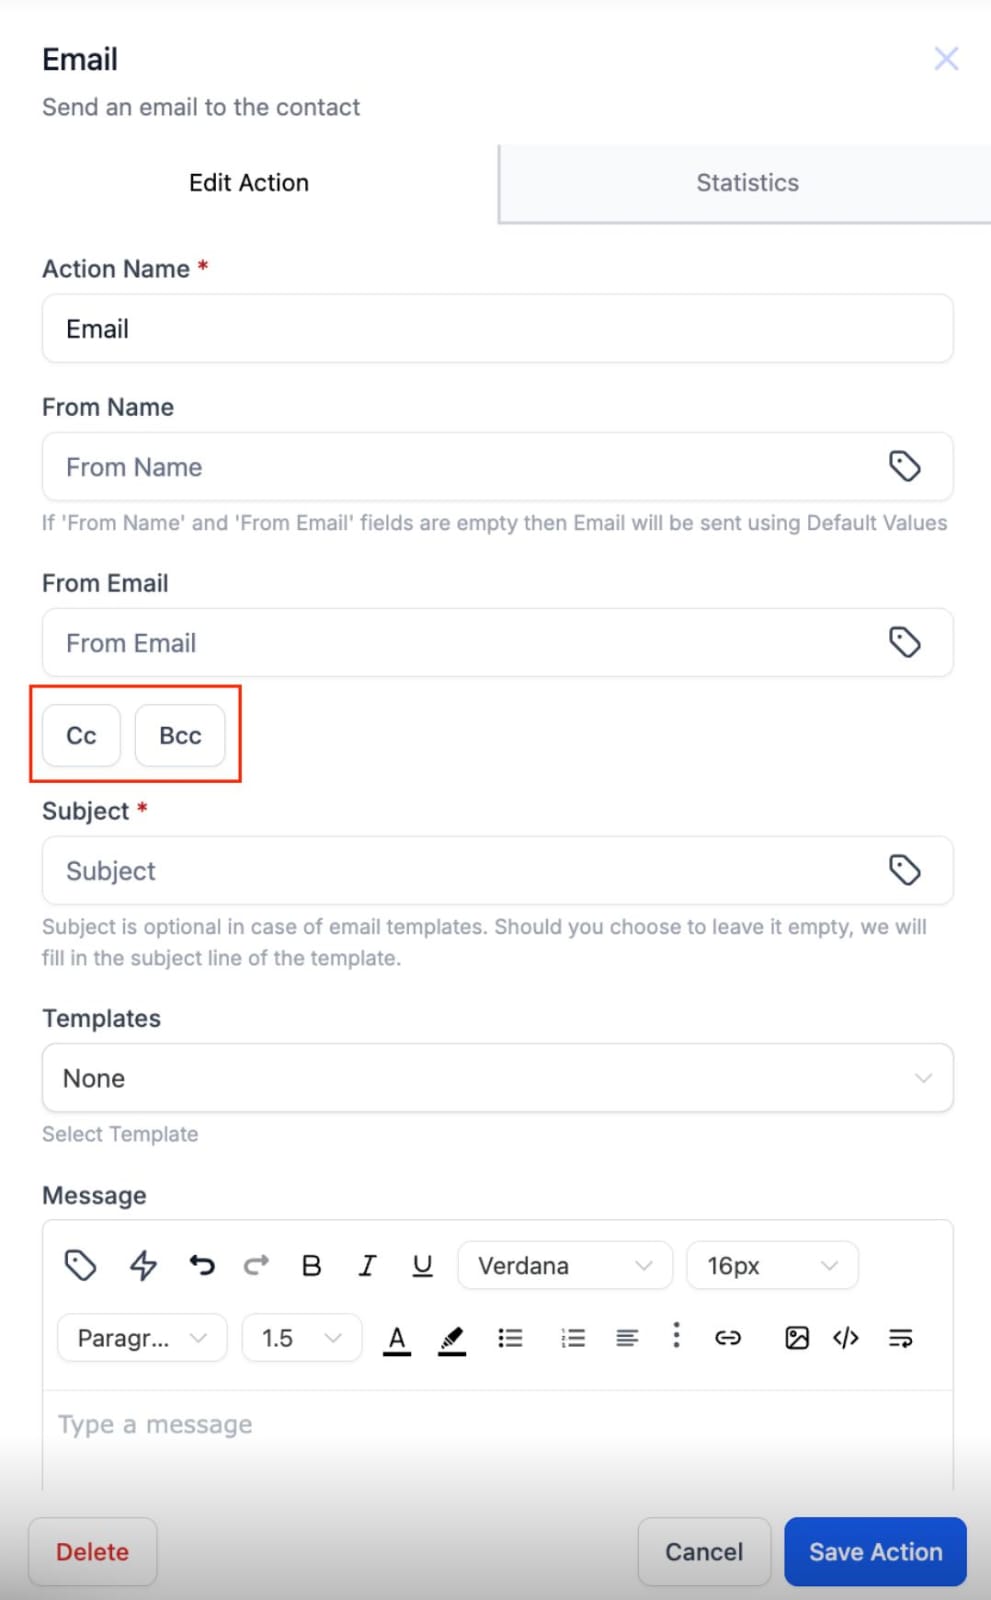
After adding the Send Email action, configure the sender details.
You can provide the From Name and From Email that should appear when the email is sent.
For example, the sender name could be your company or a specific department, depending on how your business handles customer communication.
Using recognizable sender information helps customers understand who the message is from.
You can also configure CC or BCC recipients when needed. HighLevel notes that CC and BCC recipients do not appear in Workflow Email Stats, and workflow delivery success is determined by the primary contact email.
Create a Relevant Subject Line
The subject line is one of the first things the recipient sees, so it should clearly communicate why the email was sent.
For example, an appointment confirmation could use a subject such as:
Your Appointment Is Confirmed
A follow-up email might use:
Thanks for Speaking With Us
Keep the subject specific to the action that caused the email to be sent.
HighLevel recommends keeping subject lines short and specific as part of its Send Email best practices.
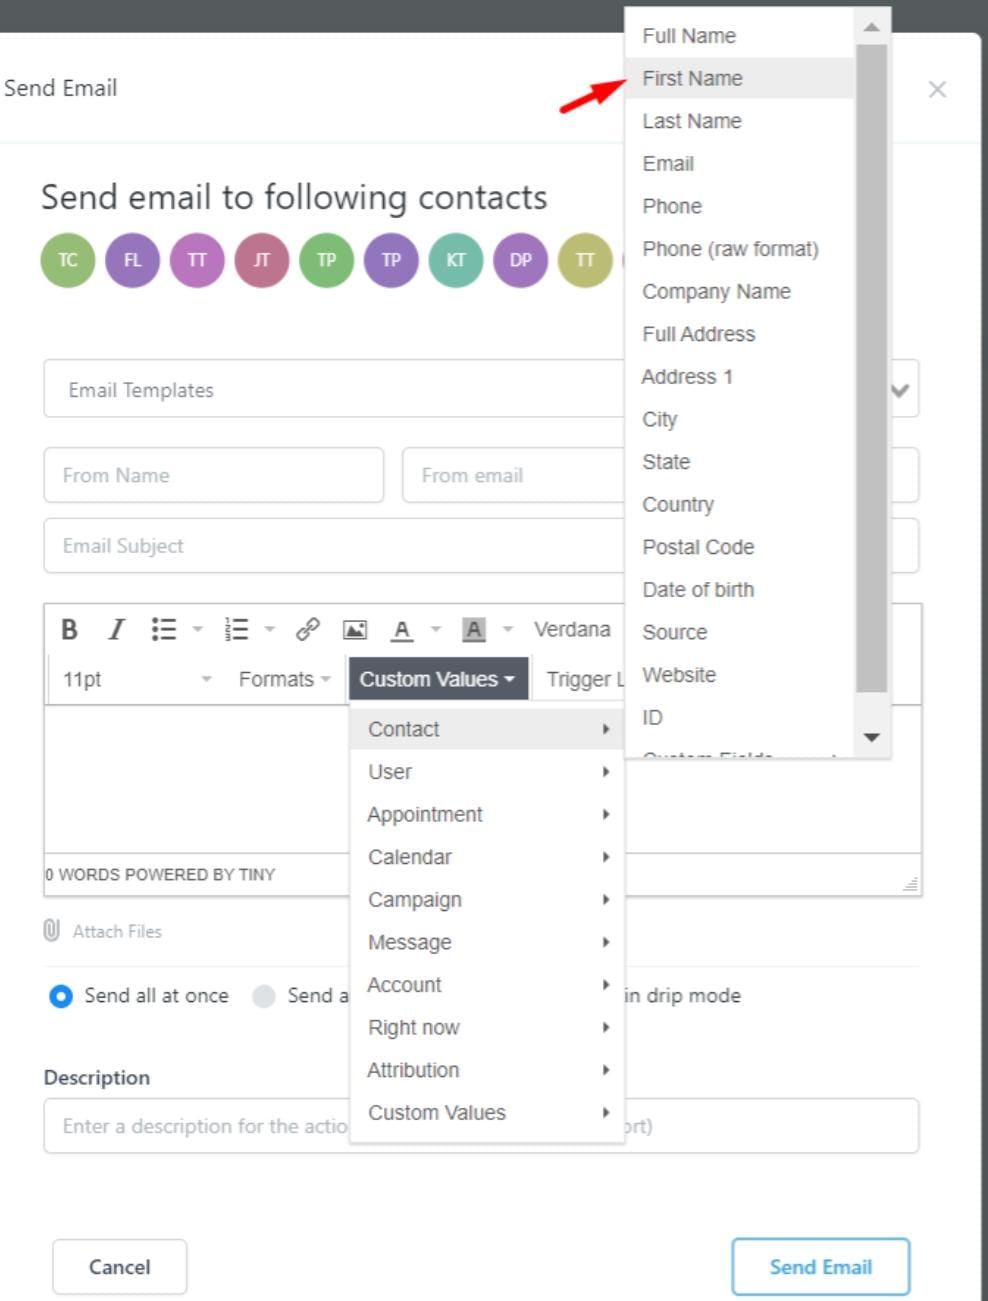
Personalize the Email With Custom Values
One of the most useful features of the Send Email action is personalization.
HighLevel allows custom values, also known as merge fields, to be inserted into supported email content. For example, you can use a contact's first name or relevant appointment information instead of sending exactly the same message to everyone.
A simple example could be:
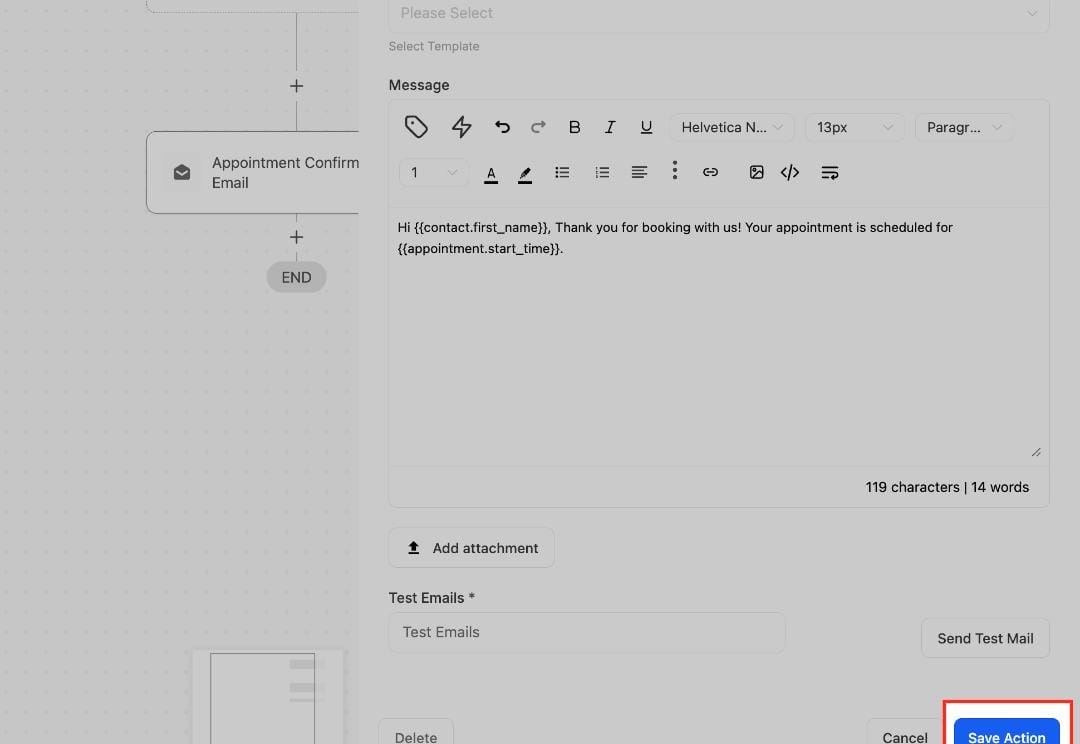
Hi {{contact.first_name}},
Thank you for booking with us. Your appointment is scheduled for {{appointment.start_time}}.
This makes an automated email feel more relevant to the individual recipient.
However, HighLevel also notes that merge fields can appear blank when the required information is not available from the contact or workflow trigger. Appointment-specific fields, for example, require appropriate appointment-related context.
Create Personalized Emails for Different Customer Journeys
The Send Email action can be used across many different workflow scenarios. The key is to match the email content with the event that caused the contact to enter the workflow.
For example, a form submission can lead to a confirmation email, while an appointment booking can trigger appointment details and a customer follow-up can send additional information later.
You can also use Wait steps between emails when communication needs to happen at different times. This allows you to create a complete email sequence instead of sending every message immediately.
A simple sequence could look like:
Trigger → Send Email → Wait → Send Email → Wait → Send Email
This structure can help businesses create consistent communication throughout the customer journey.
Use Email Templates for Consistency
If your business sends similar types of emails regularly, you can use an existing email template inside the Send Email action instead of creating every message from scratch.
HighLevel allows you to select an existing template or write the email directly in the action. When a template is selected, HighLevel also provides a Sync Edits to Template option. When enabled, edits made to the workflow email and the original template can update each other; when disabled, they remain independent.
This can be useful for businesses that want consistent branding and messaging across multiple workflows.
Add Attachments When Necessary
The Send Email action also supports attachments.
For example, a business may need to send a document, confirmation file, product information, or another relevant file as part of an automated email.
HighLevel allows files to be selected from the Media Library or uploaded from the device when configuring the Send Email action.
Only include an attachment when it provides genuine value to the recipient. The email should remain focused on the purpose of the workflow.
Test the Email Before Activating the Workflow
Testing should be part of every workflow email setup.
GoHighLevel provides a Send Test Mail option inside the Send Email action so you can review the email before finalizing the workflow.
Check the subject line, formatting, links, personalization, and any attachments.
Pay particular attention to custom values. If the workflow does not provide the information required by a merge field, that value may appear blank. HighLevel specifically notes that fields such as appointment information require appropriate appointment-related context.
Once everything looks correct, save the action and activate the workflow.
Conclusion
The Send Email action is one of the most useful communication actions available in GoHighLevel workflows. It allows businesses to automatically deliver personalized emails at the appropriate point in a customer journey.
From booking confirmations and lead follow-ups to customer updates and promotional communication, the action can support many different automation scenarios.
Personalization makes these automated messages more relevant, while templates, attachments, testing, and proper sender configuration help keep the communication professional and reliable.
The best approach is to build each email around a clear purpose, use the information your workflow actually has available, and test the complete process before allowing the automation to communicate with real customers.
Frequently Asked Questions
1. What does the Send Email action do?
It sends an automated email to a contact when the workflow reaches the Send Email step.
2. Can I personalize automated emails?
Yes. You can use custom values or merge fields to personalize supported information such as a contact's name and relevant appointment details.
3. Can I use an existing email template?
Yes. You can select an existing template or create the email directly within the Send Email action.
4. Can I attach files to an automated email?
Yes. Files can be selected from the Media Library or uploaded when configuring the action.
5. Why might a merge field appear blank?
A merge field can be blank when the required information is missing from the contact or is not provided by the workflow's trigger/action context.
Need Expert Help with GoHighLevel?
New to GoHighLevel and ready to get started? Buy your GoHighLevel account here and launch with confidence.
Already know what you need and want our team to handle everything, from complete setup and customization to funnels, workflows, automations, CRM, and pipelines? Click here.