

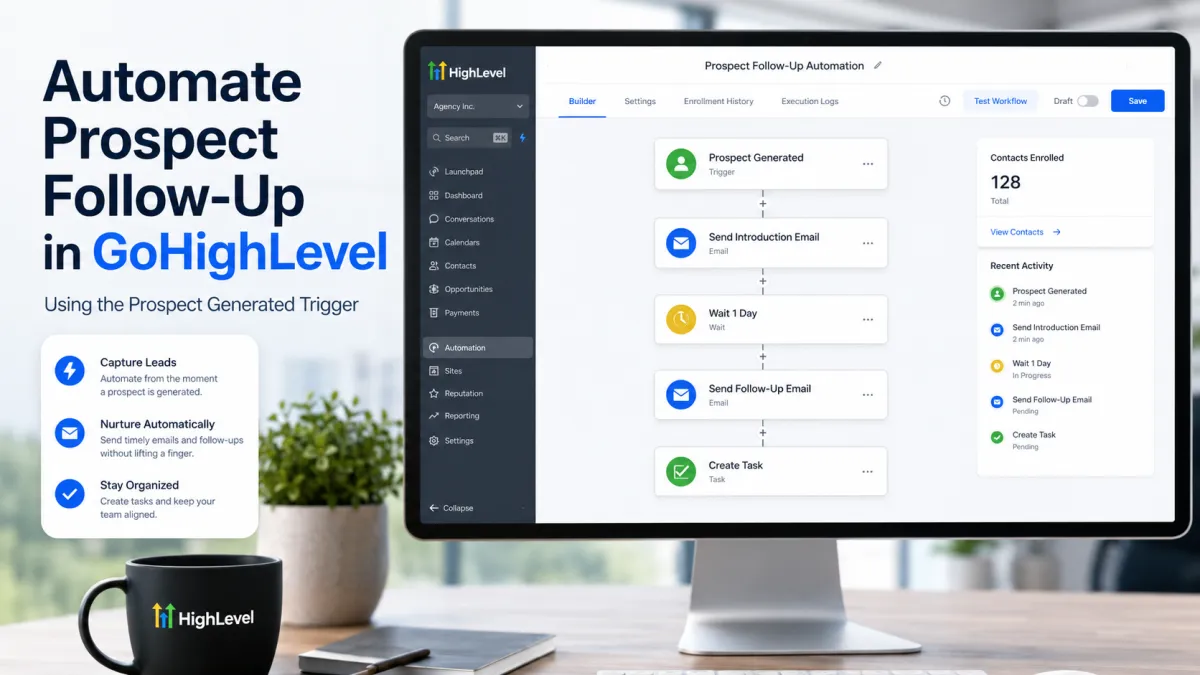
Automate Prospect Follow-Up in GoHighLevel Using the Prospect Generated Trigger
How to Automatically Follow Up with New Prospects Using the Prospect Generated Trigger in GoHighLevel
A new prospect is only valuable if your business can act on the opportunity quickly.
When prospects are generated through GoHighLevel’s Prospecting Tool, manually checking for new prospects and deciding what to do next can slow down your sales process.
The Prospect Generated Trigger in GoHighLevel allows you to automatically start a workflow whenever a new prospect is generated.
Instead of treating prospect generation as the end of the process, you can use it as the starting point for automated follow-up, lead organization, notifications, and sales activity.
In this guide, you’ll learn what the Prospect Generated Trigger does, how to configure it, and how to build a practical automated follow-up workflow around it.
What Is the Prospect Generated Trigger in GoHighLevel?
The Prospect Generated Trigger starts a workflow when a new prospect is created through GoHighLevel’s Prospecting Tool.
According to HighLevel, prospects can be generated through several methods, including:
Directly inside the Prospecting Tool
Through an embedded prospecting widget
Automatically through Prospect AI
This distinction is important.
The Prospect Generated Trigger is specifically connected to prospects generated through the Prospecting Tool ecosystem.
It should not be confused with other GoHighLevel workflow triggers such as:
Contact Created
Form Submitted
Customer Booked Appointment
Opportunity Created
Survey Submitted
Each trigger responds to a different event.
For example, Contact Created starts when a new CRM contact record is created, while Prospect Generated is designed specifically for prospects produced through GoHighLevel’s prospecting functionality.
Once a Prospect Generated event occurs, GoHighLevel can automatically start the workflow actions you have configured.
Why Use the Prospect Generated Trigger?
The biggest advantage is speed and consistency.
Without automation, someone may need to manually monitor new prospects, review them, assign them, and decide when to initiate follow-up.
With the Prospect Generated Trigger, those first operational steps can happen automatically.
A properly designed workflow can help you:
Respond to new prospects faster
Maintain a consistent follow-up process
Reduce repetitive manual work
Organize prospects automatically
Notify sales representatives about new prospects
Prevent new prospects from being overlooked
Create different workflows based on prospect characteristics
Standardize your prospecting process across your team
The goal is not necessarily to automate the entire sales conversation.
Instead, automation ensures that the correct first step happens every time a new prospect is generated.
How to Set Up the Prospect Generated Trigger in GoHighLevel
Setting up the trigger is relatively straightforward.
Step 1: Create a Workflow
Inside your GoHighLevel sub-account, navigate to:
Automation → Workflows
You can either:
Create a new workflow
Add the trigger to an existing workflow
For a new automation, starting with a blank workflow usually makes the process easier to understand and maintain.
Step 2: Add the Prospect Generated Trigger
Inside the workflow builder, click:
Add New Workflow Trigger
Search for and select:
Prospect Generated

This tells GoHighLevel to start the workflow whenever a qualifying new prospect is generated through the Prospecting Tool.
Step 3: Configure Prospect Filters
The Prospect Generated Trigger can also be filtered so that only certain prospects enter the workflow.
Two useful filtering options include:

Prospect Source
You can separate prospects depending on where they originated.
For example, you may want different automation for prospects generated from:
The GoHighLevel Prospecting Tool
A prospecting widget
Prospect AI
This allows you to build different workflows depending on how the prospect entered your system.
Conversion Rate
You can also use Conversion Rate as a filtering condition.
For example, you may decide to create different handling processes for:
Higher conversion prospects
Medium priority prospects
Lower priority prospects
This can help your sales team focus more attention on opportunities with stronger potential.
Step 4: Add Your Workflow Actions
Once the trigger is configured, add the actions that should happen after the prospect is generated.
Depending on your process, workflow actions may include:
Send Email
Send SMS
Internal Notification
Create Task
Wait
If/Else Condition
Assign User
Other supported workflow actions
The exact workflow should depend on your sales process.
Avoid adding actions simply because they are available.
Every step should have a specific operational purpose.
Step 5: Test the Workflow Before Publishing
Before activating the automation, review the entire workflow carefully.
Check:
Trigger configuration
Prospect filters
Email content
SMS content
Merge fields
Wait periods
If/Else conditions
Internal notifications
Assignment rules
Workflow exit conditions
Testing before publishing is important because even a small configuration mistake can result in prospects receiving the wrong communication or entering the wrong workflow path.
Example Prospect Follow-Up Workflow
A simple automated prospecting workflow could look like this:
Prospect Generated → Initial Follow-Up → Wait → Second Follow-Up

For example:
1. Prospect Generated
The workflow starts when GoHighLevel generates a new prospect.
2. Send an Initial Message
Send an appropriate first communication.
This could be:
An introductory email
An SMS
An internal notification to a sales representative
The first communication should be short, relevant, and focused on the next step.
Avoid immediately sending a long sales pitch.
3. Add a Wait Action
Next, add a Wait action.

For example:
Wait 1 Day
or
Wait 2 Days
This prevents the prospect from receiving several communications too quickly.
4. Send a Follow-Up
After the waiting period, send another appropriate follow-up.
The second message could:
Ask whether they saw the previous message
Provide additional information
Offer a consultation
Invite them to schedule a call
Direct them toward a relevant service page
A simple workflow could therefore look like:
Prospect Generated
Send Introduction Email
Wait 1 Day
Send Follow-Up Email
Wait 2 Days
Create Sales Follow-Up Task
This creates a structured sequence while still allowing a salesperson to take over when human interaction becomes necessary.
Use If/Else Conditions for Smarter Prospect Follow-Up
Not every prospect should necessarily follow the same automation path.
GoHighLevel’s If/Else workflow logic allows you to create different branches based on available information.

For example:
Prospect Generated
Check Prospect Condition
High Priority Prospect
Notify salesperson immediately
Create task
Begin priority follow-up
Standard Prospect
Send standard introduction
Wait
Continue follow-up sequence
This can make the workflow more efficient because prospects can be handled differently depending on their characteristics.
Real-World Example: Marketing Agency Prospecting
Imagine a marketing agency using GoHighLevel’s Prospecting Tool to identify businesses that may need digital marketing services.
When a new prospect is generated, the workflow starts automatically.
The agency could create a process such as:
Prospect Generated
Send Internal Notification to Sales Team
Send Introductory Email
Wait 1 Day
Send Follow-Up Message
Create Sales Task
The agency could also use the trigger’s available filters to separate prospects.
For example:
Prospect AI Leads
Prospects generated through Prospect AI could enter a workflow designed specifically for AI generated prospecting campaigns.
Widget Prospects
Prospects coming through an embedded prospecting widget could enter a different workflow.
Higher Conversion Prospects
Prospects meeting a particular conversion rate condition could immediately trigger a sales notification or task.
This creates a repeatable sales process without requiring someone to manually initiate every first step.
Best Practices for Prospect Generated Workflows
Automation works best when it supports the sales process rather than overwhelming the prospect.
Keep the First Message Relevant
The prospect should understand why they are being contacted.
Avoid vague or overly aggressive opening messages.
Your first communication should establish relevance and provide a logical next step.
Use Personalization
Where appropriate, use GoHighLevel merge fields to personalize communication with available prospect or contact information.
Personalized messages usually feel more natural than generic mass outreach.
However, only use personalization fields when you are confident that the required data will be available.
Space Out Follow-Ups
Do not send several messages immediately after a prospect enters the workflow.
Use Wait actions to create reasonable intervals between communications.
For example:
Initial Message → Wait 1 Day → Follow-Up → Wait 2 Days → Final Action
This makes the automation feel more deliberate and less aggressive.
Use Internal Notifications
Not every action needs to be customer facing.
Internal notifications can alert your sales team when important prospects enter the workflow.
For example:
New high priority prospect generated. Review and contact within 30 minutes.
This can be particularly useful when your sales process requires human qualification.
Create Tasks for Sales Representatives
Consider adding a Create Task action after one or more automated follow-up attempts.
For example:
Task: Personally contact prospect
This creates a clear handoff between automation and human sales activity.
Keep the Workflow Focused
Avoid building a workflow containing dozens of unnecessary actions.
A simple automation is usually:
Easier to understand
Easier to troubleshoot
Easier to test
Easier to optimize
Every action should have a clear reason for existing.
Test Everything Before Activation
Never assume your automation will behave exactly as expected.
Test:
Trigger behavior
Filters
Messages
Merge fields
Timing
Branches
Tasks
Notifications
Run several test prospects through the workflow before using it in production.
Monitor Workflow Performance
Publishing the workflow is not the final step.
Review how prospects interact with the automation.
Look for issues such as:
Too many messages
Poor response rates
Incorrect workflow paths
Unnecessary delays
Missing personalization
Sales tasks being created too late
Prospects continuing through automation after responding
Your workflow should evolve as you learn what works.
Common Mistakes to Avoid
Using the Wrong Trigger
One of the most common mistakes is selecting a workflow trigger that does not match the event you actually want to automate.
For example:
Form Submitted is for form submissions
Contact Created is for newly created CRM contacts
Customer Booked Appointment is for appointment bookings
Opportunity Created is for new opportunities
Prospect Generated is for prospects generated through the Prospecting Tool
Choose the trigger based on the event you actually want to capture.
Assuming Prospect Generated Means Every New Lead
The Prospect Generated Trigger does not automatically represent every possible new lead entering GoHighLevel.
It specifically relates to prospects generated through GoHighLevel’s Prospecting Tool functionality.
For general lead capture, another trigger may be more appropriate.
Sending Too Many Messages
Do not immediately send several emails and SMS messages within a few minutes.
This can make your outreach feel automated and intrusive.
Use Wait actions and give prospects time to respond.
Overcomplicating the Workflow
Complex automation is not automatically better automation.
A workflow with five purposeful steps can often perform better than one containing 30 poorly defined actions.
Start simple.
Then improve the workflow based on actual performance.
Simple Prospect Generated Workflow Template
Here is a practical structure you can use as a starting point:
Trigger: Prospect Generated
Filter: Prospect Source or Conversion Rate
Internal Notification
Send Introductory Message
Wait 1 Day
Send Follow-Up
Wait 2 Days
Create Sales Task
Continue, branch, or end the workflow

This gives your team both automation and human follow-up without making the process unnecessarily complicated.
Conclusion
The Prospect Generated Trigger in GoHighLevel provides a practical way to connect prospect generation directly with workflow automation.
When a new prospect is created through the Prospecting Tool, the trigger can immediately start a predefined process for:
Follow-up
Sales notifications
Lead organization
Task creation
Qualification
Workflow routing
The real value comes from how you design the automation.
Use the correct trigger, apply relevant prospect filters, create purposeful workflow actions, add sensible delays, and thoroughly test everything before publishing.
When configured correctly, the Prospect Generated Trigger becomes more than a notification that a new prospect exists.
It becomes the starting point of a consistent and scalable prospect follow-up system.
Frequently Asked Questions
1. What Is the Prospect Generated Trigger in GoHighLevel?
The Prospect Generated Trigger starts a workflow when a new prospect is generated through GoHighLevel’s Prospecting Tool.
2. When Does the Prospect Generated Trigger Fire?
It fires when a new prospect is generated through supported GoHighLevel prospecting functionality.
3. Can I Automatically Follow Up with Prospects?
Yes.
You can use the trigger to start a workflow containing follow-up actions such as email, SMS, internal notifications, tasks, Wait actions, and workflow conditions.
4. Can I Filter the Prospect Generated Trigger?
Yes.
Available filtering options can include criteria such as Prospect Source and Conversion Rate.
These filters allow you to send different prospects into different automation paths.
5. Is Prospect Generated the Same as Contact Created?
No.
Prospect Generated relates specifically to prospects generated through GoHighLevel’s Prospecting Tool.
Contact Created starts when a new CRM contact record is created.
They represent different events and should not be used interchangeably.
6. Can I Add Delays Between Follow-Up Messages?
Yes.
Use GoHighLevel’s Wait workflow action to create delays between workflow steps.
This allows you to space communication rather than sending multiple messages immediately.
7. Can I Notify My Sales Team When a Prospect Is Generated?
Yes.
You can add internal notification or task actions to alert your sales team when qualifying prospects enter the workflow.
8. Can Different Prospects Enter Different Workflow Paths?
Yes.
You can use trigger filters and If/Else conditions to create different paths based on available prospect information or workflow conditions.
Need Expert Help with GoHighLevel?
New to GoHighLevel and ready to get started? Buy your GoHighLevel account here and launch with confidence.
Already know what you need and want our team to handle everything, from complete setup and customization to funnels, workflows, automations, CRM, and pipelines? Click here.