

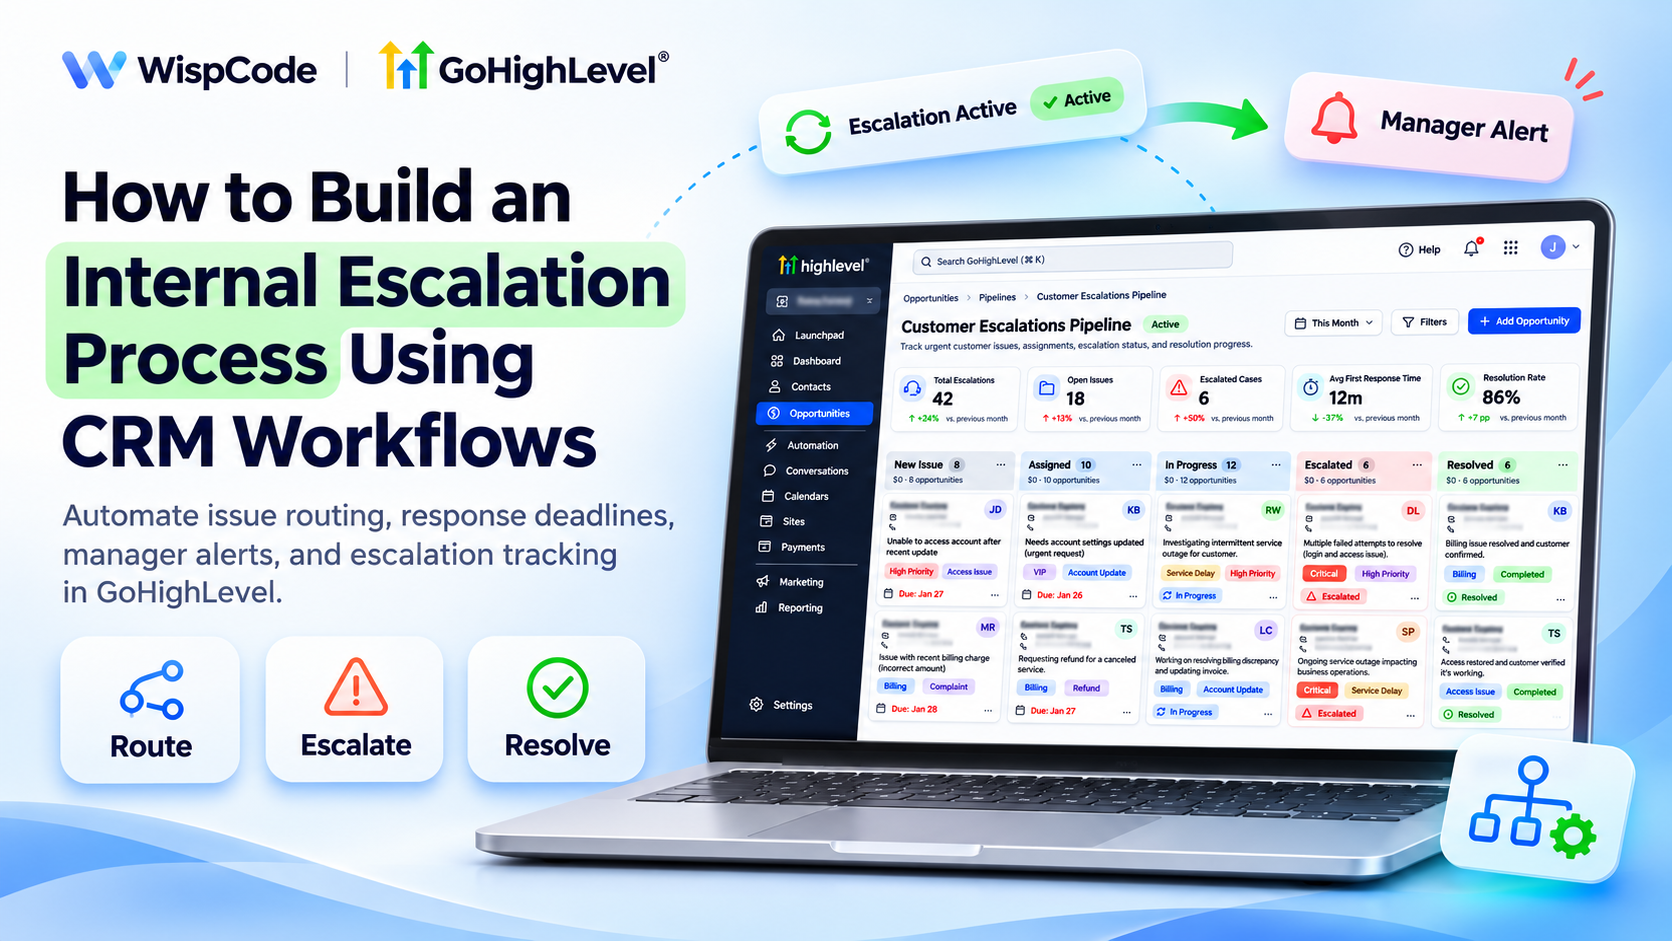
How to Build an Internal CRM Escalation Workflow
How to Build an Internal Escalation Process Using CRM Workflows
A customer submits an urgent complaint, but the assigned employee is busy handling other requests. Hours pass without a response, and the issue never reaches a manager.
The problem isn't necessarily poor customer service. It's the absence of a reliable escalation process.
GoHighLevel helps businesses address this through CRM workflows that automatically identify specific events, notify responsible team members, create follow-up tasks, and track unresolved issues.
With the right workflow, businesses can establish clear responsibilities and ensure important customer concerns receive timely attention.
How Internal Escalation Workflows Work in GoHighLevel
An internal escalation workflow automatically routes customer issues to the appropriate team members when predefined conditions are met.
GoHighLevel uses workflow triggers, conditional logic, wait actions, and internal notifications to manage this process.
For example, a customer complaint can trigger an automation that alerts the assigned representative. If nobody responds within the required timeframe, the workflow can notify a manager.
Businesses can also use pipeline stages and CRM tasks to organize escalated cases.
The key is defining which events require escalation, who should respond, and when additional action becomes necessary.
What You Need Before Creating an Escalation Workflow
Before starting, make sure you have:
Access to the appropriate GoHighLevel sub-account.
Team members added with suitable permissions.
A defined escalation policy and response deadlines.
A CRM pipeline for tracking customer issues.
Configured internal notification channels.
A reliable method for identifying urgent requests.
Also, decide how your team will record when an issue has been resolved.
These requirements help prevent unnecessary alerts and unclear responsibilities.
How to Build an Internal Escalation Process in GoHighLevel
Follow these six steps to create an automated escalation workflow.
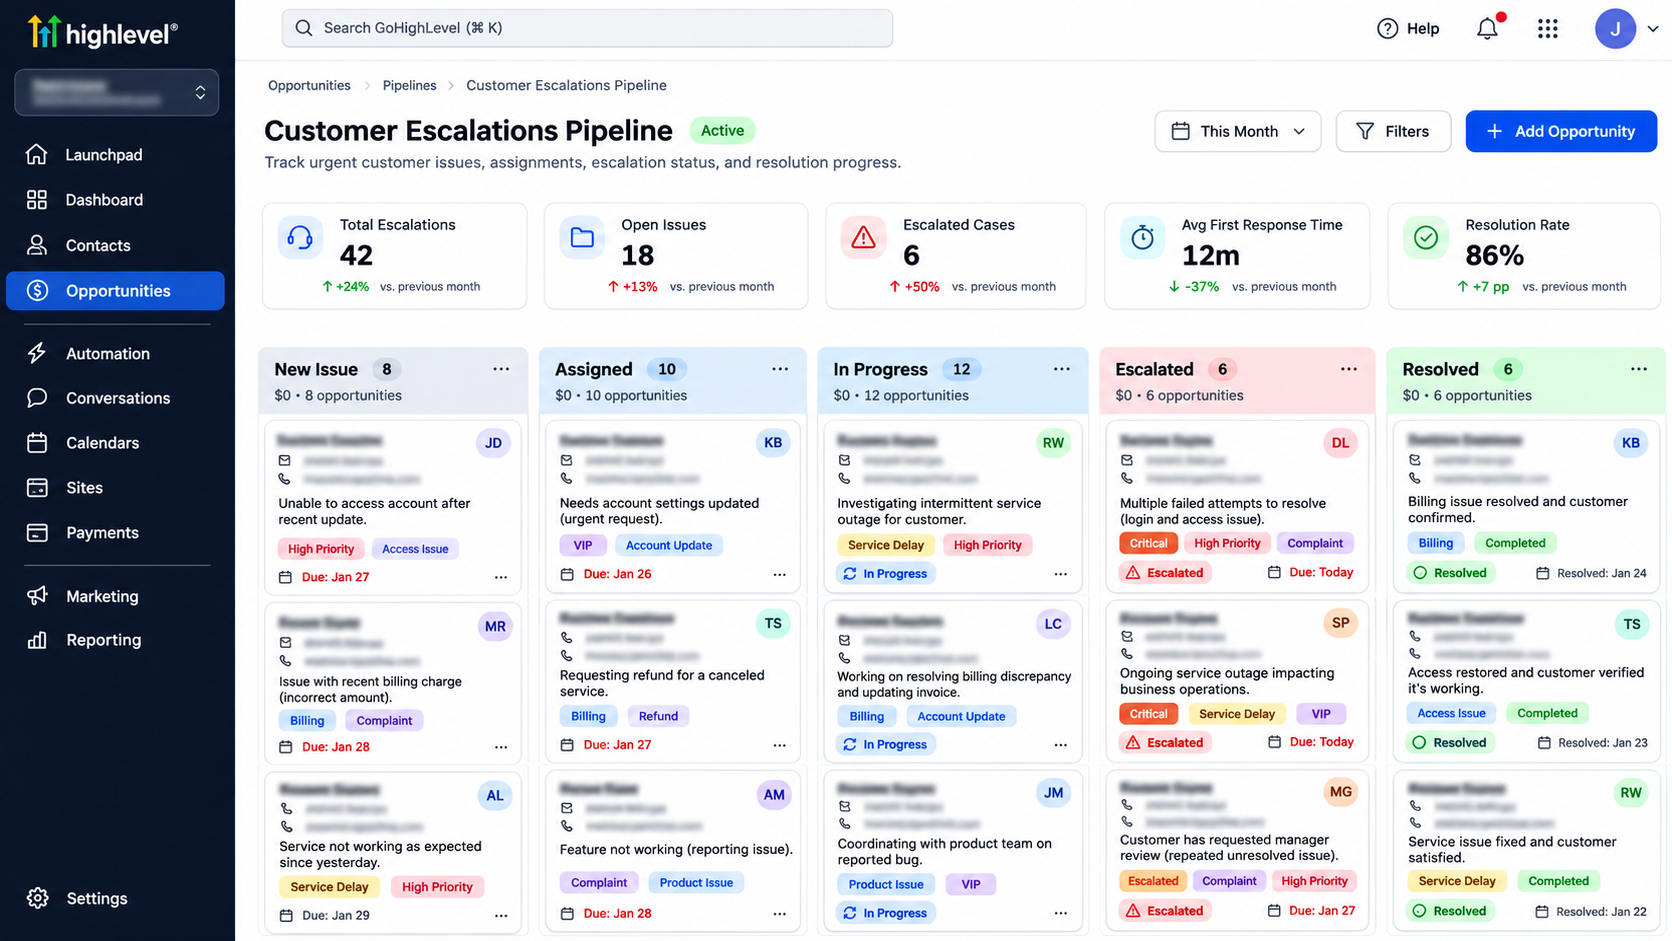
Step 1: Create an Escalation Pipeline
Navigate to Opportunities → Pipelines.
Create a pipeline called "Customer Escalations" with stages such as:
New Issue
Assigned
In Progress
Escalated
Resolved
These stages help employees and managers understand the status of each case.
Move opportunities between stages as issues progress. You can also use workflow actions to update opportunity stages automatically when appropriate.
Keep ownership and resolution responsibilities clearly defined.
Step 2: Create a New CRM Workflow
Navigate to Automation → Workflows → Create Workflow.
Select Start from Scratch.
Name your workflow "Internal Customer Escalation."
Click Add New Trigger and choose an event that represents a customer issue.
For example, select Customer Replied and apply supported filters to identify relevant complaint messages.
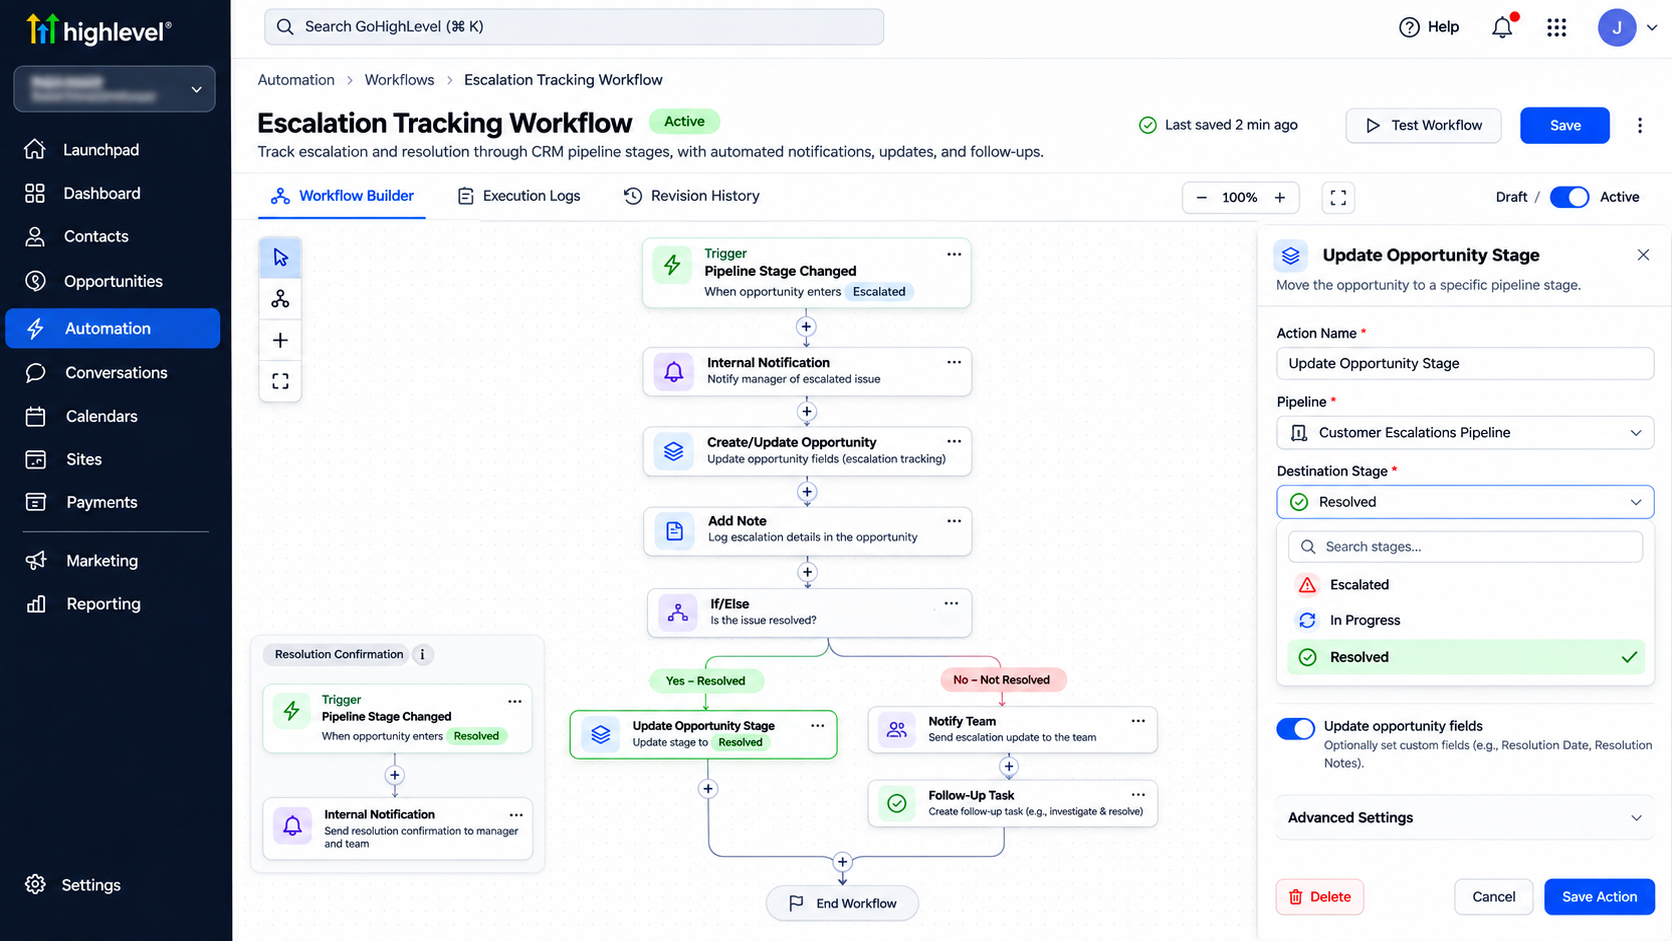
Alternatively, use Pipeline Stage Changed to start the workflow when an opportunity enters a designated escalation stage.
Save your trigger before adding actions.
Step 3: Configure Escalation Conditions
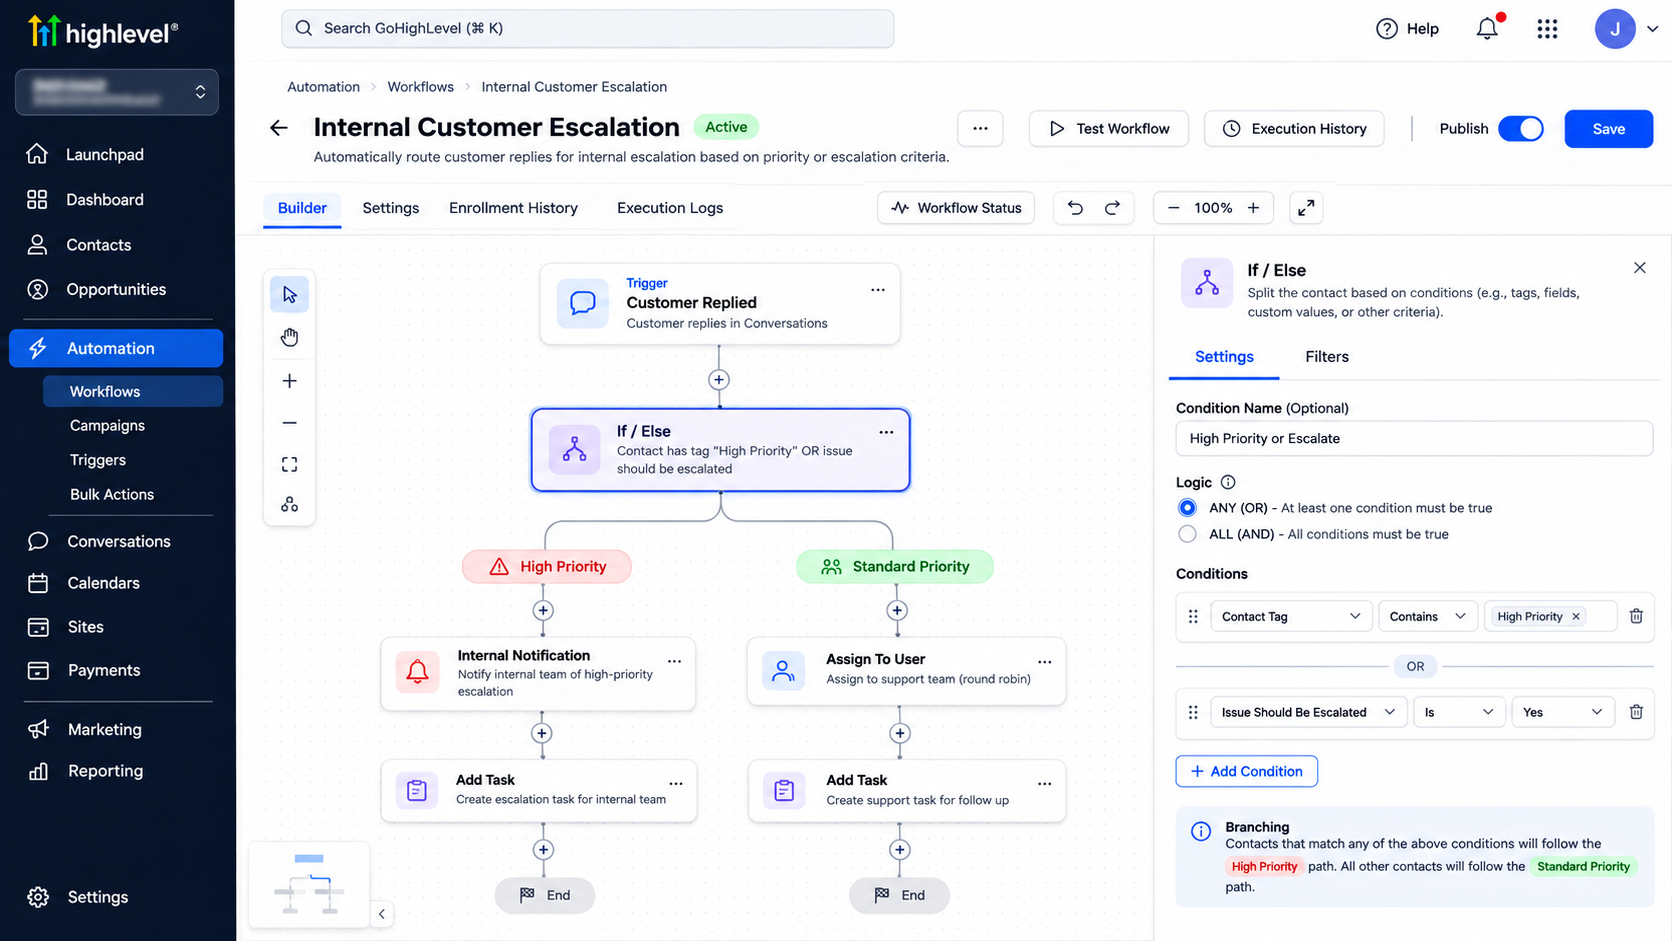
Add an If/Else action to separate urgent issues from routine requests.
For example, a support business might use a contact tag such as "High Priority" to identify cases requiring immediate attention.
Configure the branches to check whether that tag exists.
High-priority branch: Continue directly to the urgent notification process.
Standard-priority branch: Follow the normal support procedure.
Use existing CRM information or deliberately configured tags rather than assuming the system can automatically determine the seriousness of every complaint.
Step 4: Add Internal Notifications and Tasks
Under the appropriate branch, click the plus icon and select Internal Notification.
Choose a supported notification method, such as email, in-app notification, SMS, or WhatsApp, depending on your account configuration.
Select the responsible team member or role.
Include useful information such as the customer reference, issue summary, priority, and required next action.
Next, add an Add Task action.
Assign the task to the responsible employee and configure an appropriate due date.
For example, an urgent complaint might require an initial response within 15 minutes.
This gives the employee a clear responsibility while helping managers monitor outstanding work.
Step 5: Configure Time-Based Escalation
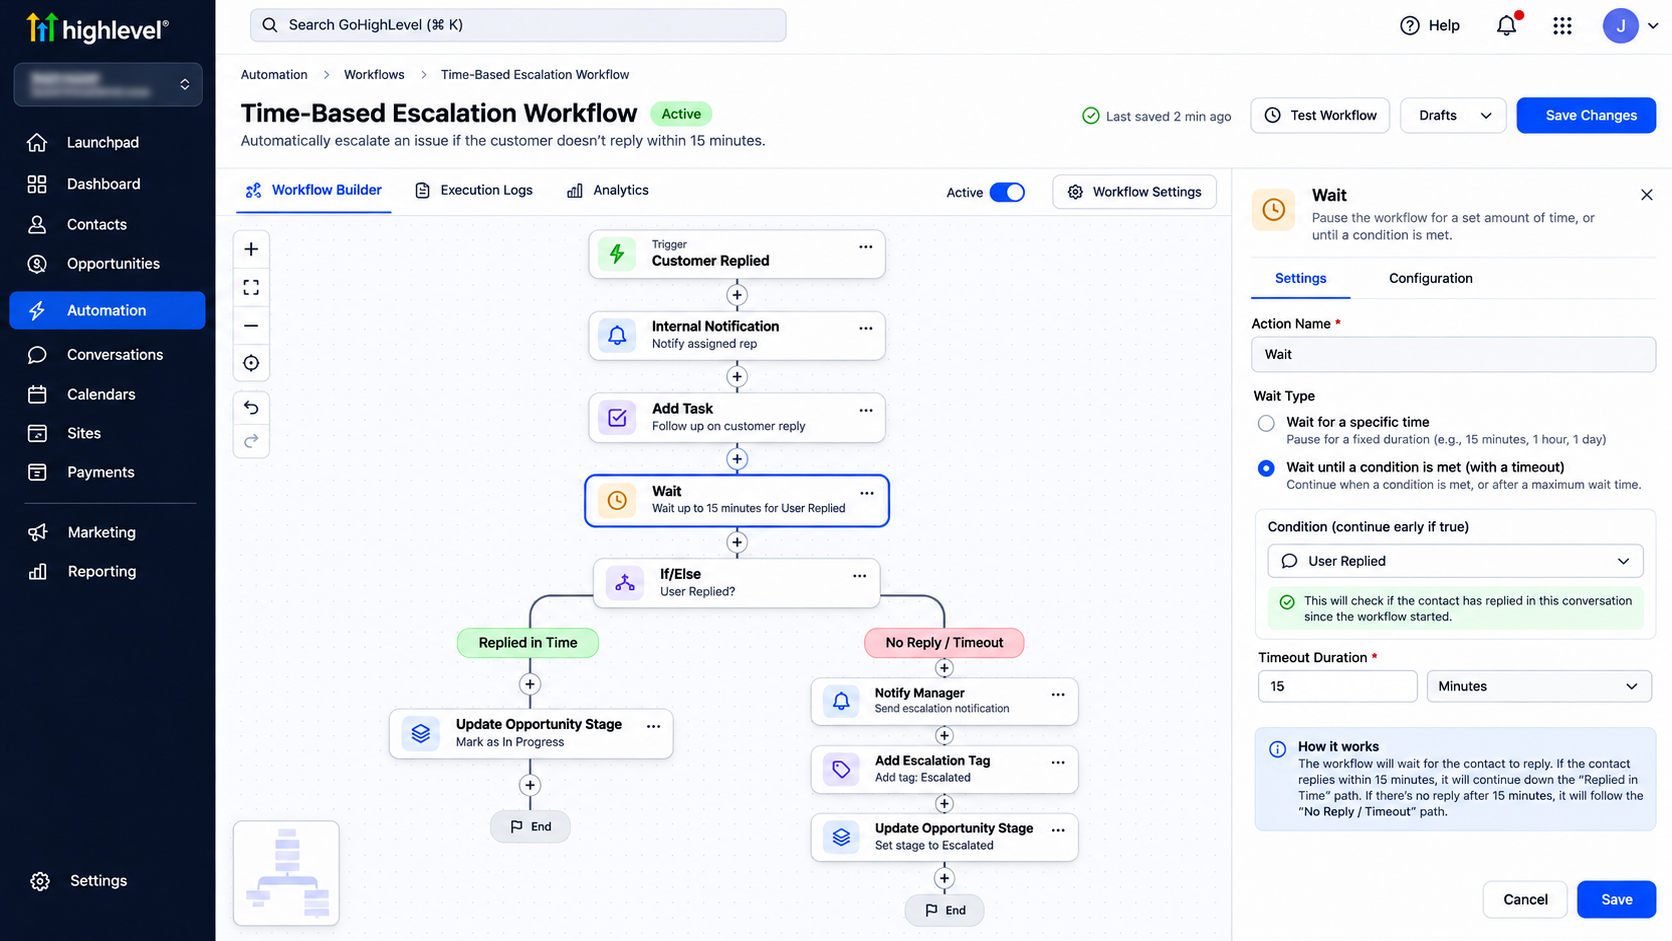
Add a Wait action to control when an unresolved issue should move to the next escalation level.
For a customer-message response process, configure the wait condition around User Replied, with an appropriate timeout.
For example, wait up to 15 minutes for a team member to reply.
If the timeout occurs without a qualifying reply, continue to a manager notification.
If the employee responds, direct the workflow away from the unanswered-message escalation branch.
Remember that a response does not necessarily mean the customer issue is resolved. Track final resolution separately using your pipeline or another reliable CRM field.
Step 6: Track Escalation and Resolution
Use CRM opportunity stages to monitor the progress of escalated cases.
For example, move an opportunity into the Escalated stage when a manager takes responsibility.
After the problem is resolved, update the record to Resolved.
You can configure additional workflows using Pipeline Stage Changed to notify relevant team members when the case moves into a new stage.
Review workflow execution logs to check whether the expected actions occurred.
Test Your Internal Escalation Workflow
Create a test contact and simulate a customer complaint.
Confirm that the trigger activates, conditions route the contact correctly, and the assigned employee receives the notification.
Test both scenarios: an employee replying before the deadline and no employee responding before the timeout.
Verify that manager notifications, tasks, and opportunity updates behave as expected.
Common Escalation Workflow Problems and Fixes
Workflow not triggering: Check publication status, trigger filters, and test events.
Notifications not received: Verify selected recipients and notification settings.
Incorrect escalation routing: Review tags, If/Else conditions, and CRM data.
Duplicate escalations: Check workflow re-entry settings and repeated triggers.
Escalation continues after a reply: Review the User Replied wait condition and timeout branches.
Best Practices for Effective Internal Escalation
Set realistic response deadlines and establish clear escalation ownership.
Limit alerts to relevant team members and avoid unnecessary notifications.
Document resolution outcomes, review recurring issues, and monitor response times regularly.
Conclusion
An effective internal escalation process helps businesses respond to customer issues consistently and maintain accountability.
GoHighLevel workflows make it easier to automate notifications, assign responsibilities, monitor response deadlines, and track escalations.
Need help building reliable CRM escalation workflows? WispCode provides GoHighLevel CRM automation, workflow configuration, and business process optimization solutions tailored to your team's operational needs.
Frequently Asked Questions
1. Can GoHighLevel automatically escalate customer issues?
Yes. Workflows can use supported triggers, conditions, wait actions, and notifications to automate escalation processes.
2. Can I notify managers when employees don't respond?
Yes. A User Replied wait condition with a timeout can initiate internal notifications when a qualifying response is not received.
3. Can GoHighLevel create escalation tasks automatically?
Yes. The Add Task workflow action can create tasks and assign responsibilities to team members.
4. How can I prevent duplicate escalation alerts?
Configure appropriate trigger filters, workflow re-entry settings, and conditions that prevent repeated escalation.
5. Can I track escalated issues through a CRM pipeline?
Yes. Opportunity stages can represent issue progress, while workflows can respond to supported stage changes.
Need Expert Help with GoHighLevel?
New to GoHighLevel and ready to get started? Buy your GoHighLevel account here and launch with confidence.
Already know what you need and want our team to handle everything, from complete setup and customization to funnels, workflows, automations, CRM, and pipelines? Click here.