
Affiliate Created Trigger in GoHighLevel: Onboarding Step by step Guide
How to Welcome and Onboard New Affiliates Using the Affiliate Created Trigger in GoHighLevel
Introduction
Every new affiliate who joins your program deserves a fast, consistent welcome, but doing this manually doesn't scale. That's where the Affiliate Created trigger in GoHighLevel comes in. This trigger fires automatically whenever a new affiliate is added to your sub-account, giving you a reliable starting point for onboarding automation.
Manual onboarding creates real problems: affiliates wait too long for information, welcome messages get inconsistent, and your team spends time on repetitive tasks instead of growing the program. GoHighLevel's workflow automation solves this by responding the moment an affiliate is created.
In this article, you'll learn what the Affiliate Created trigger does, how to set it up, how to build a welcome and onboarding workflow around it, what your welcome message should include, and how to test everything before it goes live.
What Is the Affiliate Created Trigger in GoHighLevel?
The Affiliate Created trigger is a workflow trigger inside GoHighLevel's Affiliate Manager automation tools. It starts a workflow the moment a new affiliate is created in your sub-account, whether that affiliate signed up through a form, was added manually, or was created through another connected process.
In GoHighLevel, an "affiliate" is a contact added to your Affiliate Manager, typically to promote your products or services in exchange for commissions. Once someone becomes an affiliate, you'll want to greet them, set expectations, and provide the resources they need to start referring without a team member having to do this by hand every time.
This is where event-based automation helps. Instead of checking daily for new sign-ups, the workflow waits for the "affiliate created" event and responds instantly, keeping onboarding timely as your program grows.
Why Automate Affiliate Onboarding?
Automating the first touchpoint with a new affiliate has clear, practical benefits:
Faster welcome process. Affiliates get a response within minutes instead of waiting for someone to notice they signed up.
Consistent onboarding. Every affiliate receives the same core information, so nothing gets skipped.
Less repetitive manual work. Your team stops sending the same welcome email and notification over and over.
Faster access to key information. New affiliates get program details and next steps right away.
A standardized experience. New partners form their first impression through a smooth, professional welcome sequence.
Easier scaling. Automation keeps onboarding manageable as your program grows without adding headcount.
These are realistic, day-to-day improvements, but for a business managing an active affiliate program, they add up quickly.
How to Set Up the Affiliate Created Trigger
Setting up the trigger itself is straightforward. Here's how to do it:
Go to Workflows. From your GoHighLevel sub-account, open the Automation section.
Create or open a workflow. Start a new one for affiliate onboarding, or build on an existing workflow.
Add the Affiliate Created trigger. Click "Add New Workflow Trigger," search for Affiliate Created, and select it.
Review any available trigger settings. Filtering options are limited; if none appear, the trigger fires for any new affiliate created in the sub-account.
Save the trigger. Click Save Trigger to confirm.
Continue building your workflow. Add the actions that make up your welcome and onboarding sequence.
GoHighLevel's interface is updated regularly so that menu layouts may differ slightly from older tutorials, but the core steps above reflect how the trigger is accessed and configured.

Build the Affiliate Welcome Workflow
Once the Affiliate Created trigger fires, add a sequence of actions to welcome and onboard the new affiliate. GoHighLevel's Affiliate Manager includes actions built specifically for this:
Add to Affiliate Manager – adds the contact to your Affiliates list with an "active" status.
Update Affiliate – marks an affiliate as active or inactive.
Add to Affiliate Campaign – enrolls the affiliate into a campaign from the Campaigns tab.
Remove from Affiliate Campaign – removes the affiliate when they no longer qualify.
Add Leads Under an Affiliate – assigns a lead to the affiliate, useful for handing off initial referrals.
Add Manual Sales for an Affiliate – logs a manual sale against the affiliate's record for commission tracking.
Alongside these, you can use standard workflow actions like sending an email or SMS, adding an internal notification, applying tags, creating a follow-up task, and adding wait steps.
Not every workflow action is designed specifically for affiliates, so confirm each one behaves as expected before relying on it. For onboarding, you'll typically lean on Add to Affiliate Manager and Add to Affiliate Campaign, while actions like Add Leads Under an Affiliate or Add Manual Sales for an Affiliate suit later stages, once the affiliate is active.

What Should Your Affiliate Welcome Message Include?
A good affiliate welcome message does more than say "thanks for joining." It should give the affiliate everything they need to take their first action confidently. Include:
A genuine welcome confirming they've joined your program.
Confirmation of status, so they know their sign-up was accepted.
Basic program information, such as how the affiliate relationship works.
Clear next steps, like where to get their referral link.
Access to resources, such as marketing materials or product information.
A contact point for support.
Key terms or expectations, including commission basics, if relevant.
Keeping this message clear and focused helps affiliates feel confident rather than overwhelmed on day one.
Create a Multi-Step Affiliate Onboarding Sequence
A single welcome message is a good start, but a short sequence often does a better job of fully onboarding a new affiliate. A realistic structure looks like this:
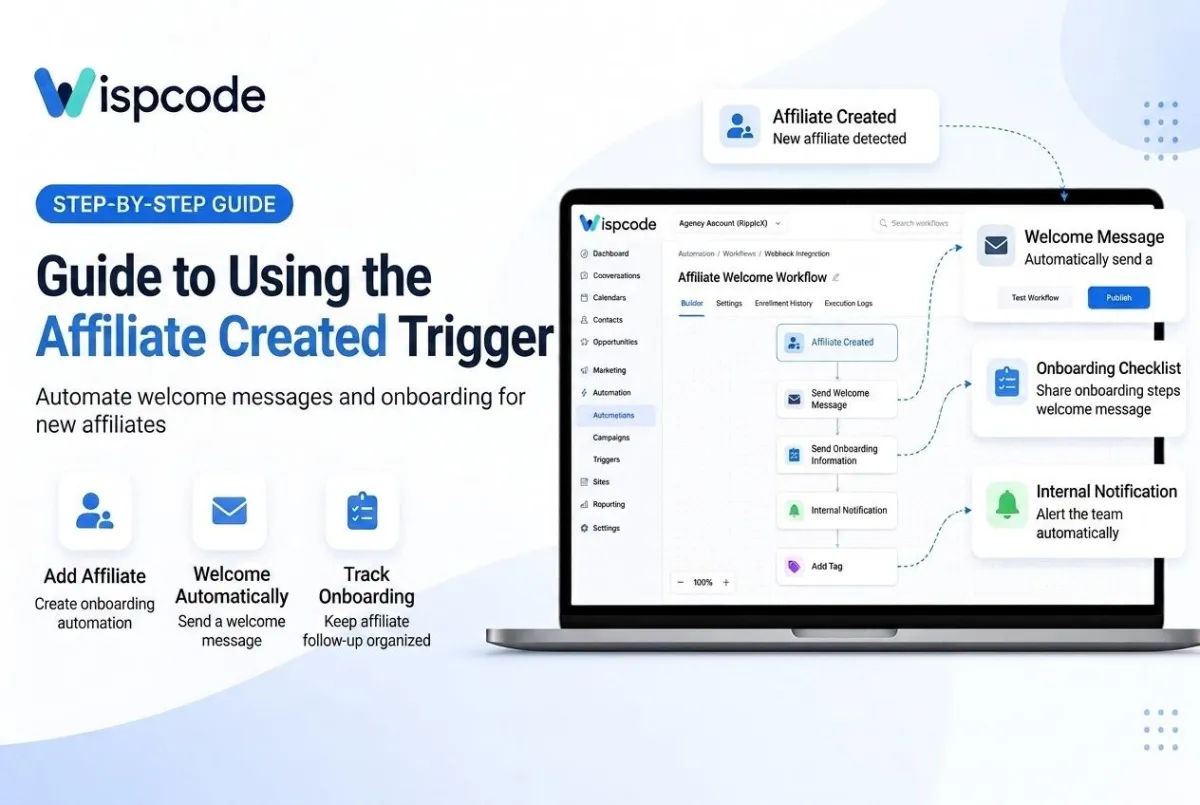
Affiliate Created → Welcome Message → Wait → Onboarding Information → Wait → Follow-Up → Internal Notification
Here's what each stage accomplishes:
Welcome Message – Confirms the affiliate has joined and sets a positive first impression.
Wait – Gives the affiliate time to absorb the welcome message.
Onboarding Information – Delivers deeper details, like resources or dashboard access.
Wait – Adds space before checking in again.
Follow-Up – Checks whether the affiliate has taken their first step.
Internal Notification – Alerts your team that onboarding is complete, or flags them for outreach.
This structure keeps onboarding simple while covering the key information a new affiliate needs.

Personalize the Affiliate Onboarding Experience
Generic, one-size-fits-all messages are easy to ignore. Personalizing your onboarding communication using the affiliate's name and any other information already stored on their contact record makes the experience feel more relevant and professional.
GoHighLevel supports standard contact merge fields, which you can use wherever they apply. Stick to information you know is captured on the contact record, such as name or email, rather than assuming affiliate-specific data fields exist unless you've confirmed they're part of your setup. This avoids blank or broken merge tags in the final message.
Test the Workflow Before Publishing
Testing is not optional. A broken onboarding workflow can leave new affiliates without a welcome message or, worse, send confusing or incomplete information. Before activating your workflow, run through this checklist:
Confirm the trigger fires correctly when a new affiliate is added.
Verify the intended affiliate enters the workflow.
Check that each action executes correctly, in order.
Review message content and personalization for proper merge fields.
Confirm delays work as intended.
Check the workflow's execution history to see how contacts moved through the steps.
Make corrections and re-test before going fully live.
Testing with a sample affiliate record before going live will save you from fixing mistakes after real affiliates have already received them.

Common Affiliate Onboarding Automation Mistakes
Even a well-intentioned onboarding workflow can go wrong. Watch out for these common mistakes:
Sending too much information at once, which overwhelms new affiliates.
Overcomplicating the workflow with unnecessary branches or steps.
Skipping testing, risking broken or incomplete messages.
Using incorrect personalization fields that don't match your contact data.
Failing to define a clear next step after the welcome message.
Assuming data exists that isn't actually captured, leading to blank fields.
Not monitoring workflow execution after launch.
Avoiding these keeps your onboarding automation reliable as your program scales.
Frequently Asked Questions
What does the Affiliate Created trigger do in GoHighLevel?
It starts a workflow automatically whenever a new affiliate is created in your sub-account. This lets you respond instantly with a welcome message or onboarding sequence, instead of manually reaching out to each new affiliate.
How do I create an affiliate onboarding workflow in GoHighLevel?
Go to Workflows, create a new workflow, and add the Affiliate Created trigger. From there, add actions like a welcome message, wait steps, and follow-up actions to build a complete onboarding sequence for new affiliates.
Can I automatically welcome new affiliates?
Yes. By pairing the Affiliate Created trigger with a message action, you can send a welcome email or SMS the moment someone becomes an affiliate, without any manual work from your team.
What should I include in an affiliate welcome message?
Include a clear welcome, confirmation of their affiliate status, basic program details, next steps, links to resources, and a contact point for questions. Keeping it focused helps new affiliates know exactly what to do first.
Can I add delays to an affiliate onboarding workflow?
Yes. GoHighLevel workflows support wait steps, which let you space out messages so affiliates aren't overwhelmed with information all at once during onboarding.
Conclusion
The Affiliate Created trigger gives you a reliable way to welcome and onboard new affiliates the moment they join your program. By building a workflow around this trigger, you can send timely welcome messages, deliver onboarding information in manageable steps, and keep your internal team informed all without manual effort.
Automating affiliate onboarding in GoHighLevel doesn't just save time; it creates a more consistent, professional first impression for every affiliate. Before rolling your workflow out to real sign-ups, test it thoroughly using the checklist above.
Ready to put this into practice? Start by adding the Affiliate Created trigger to a new workflow and building a simple welcome sequence. From there, refine it based on how your affiliates respond or bring in a GoHighLevel automation specialist to help build a more advanced system.
Need Expert Help with GoHighLevel?
New to GoHighLevel and ready to get started? Buy your GoHighLevel account here and launch with confidence.
Already know what you need and want our team to handle everything, from complete setup and customization to funnels, workflows, automations, CRM, and pipelines? Click here.